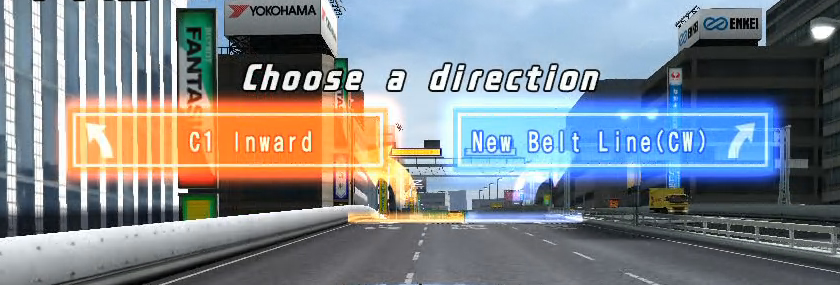
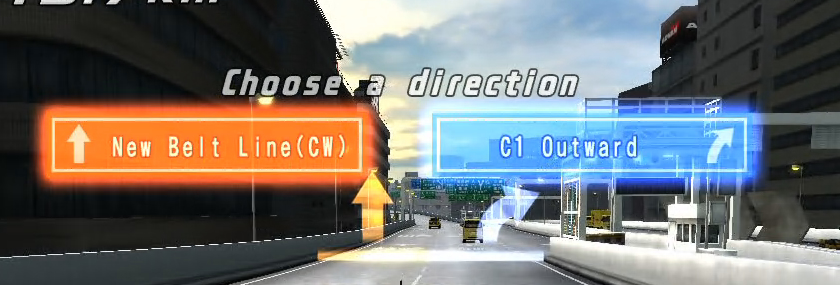
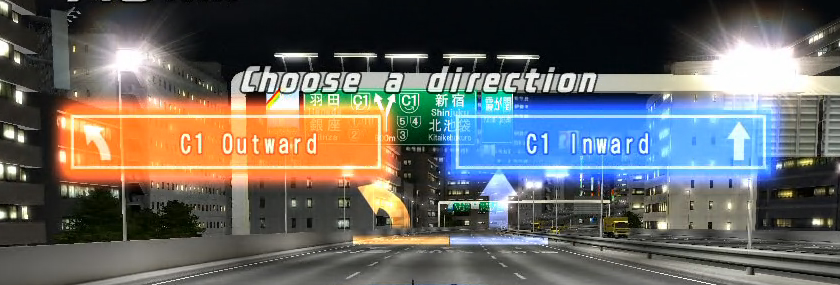
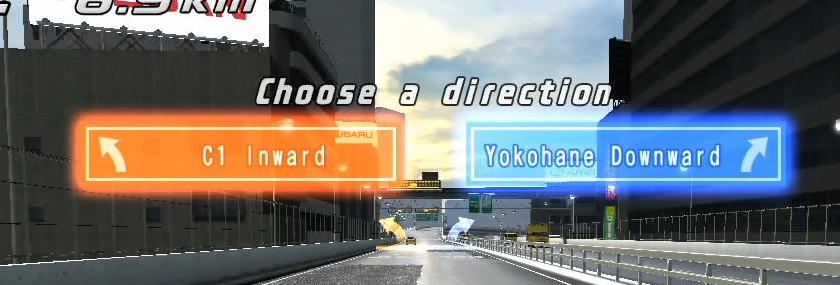
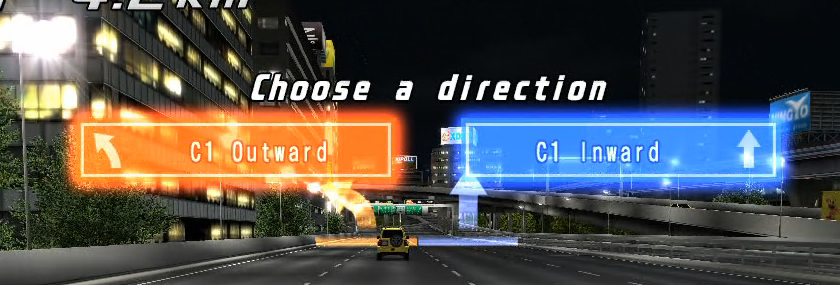
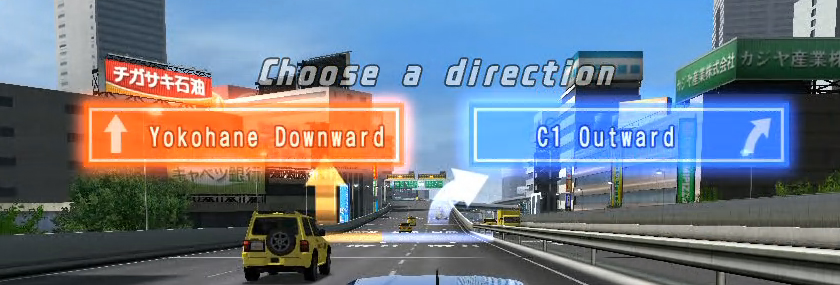
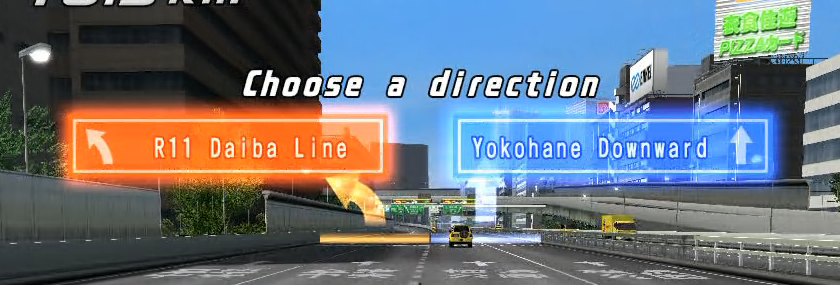
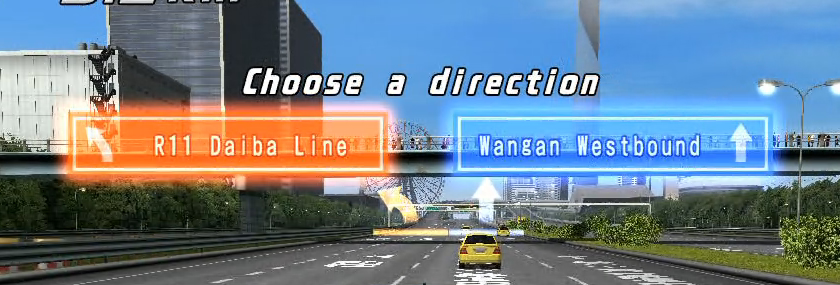
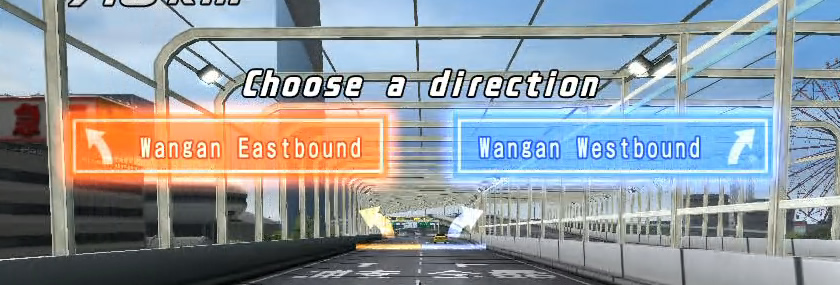
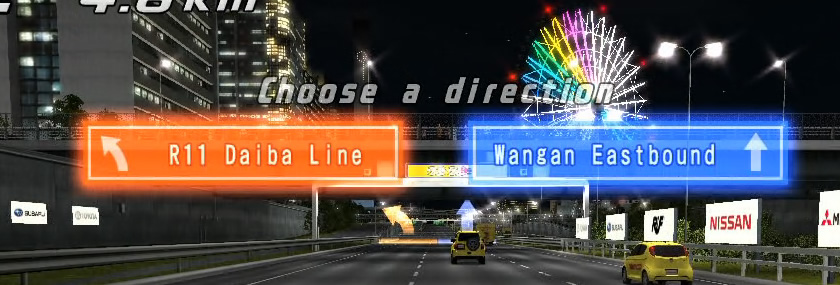
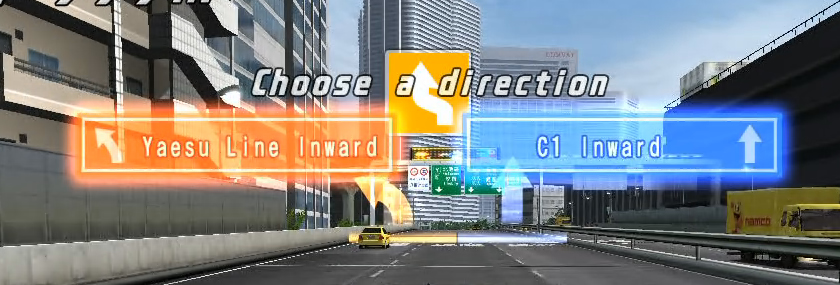
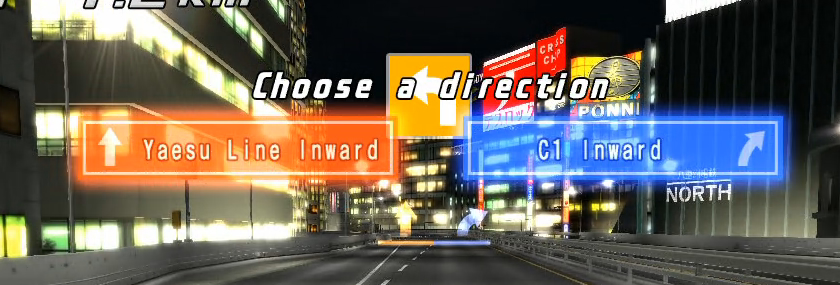
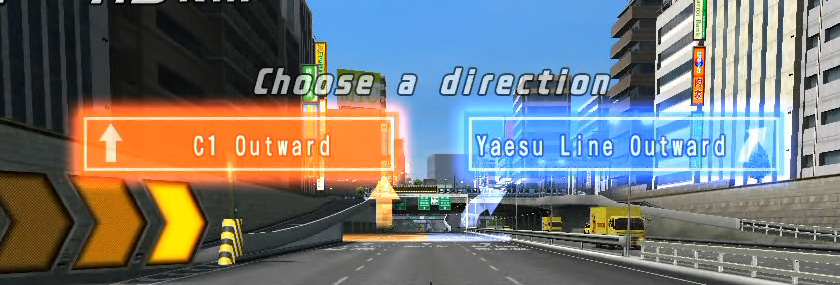
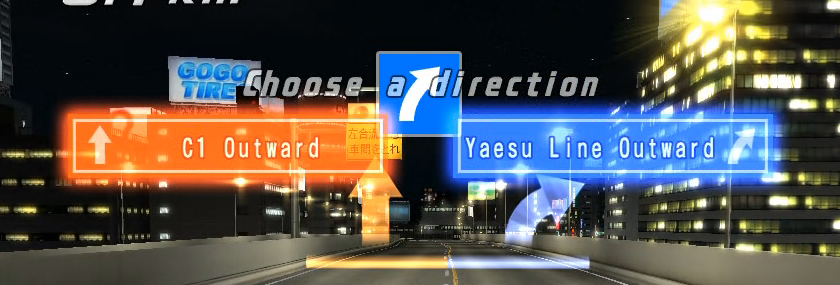
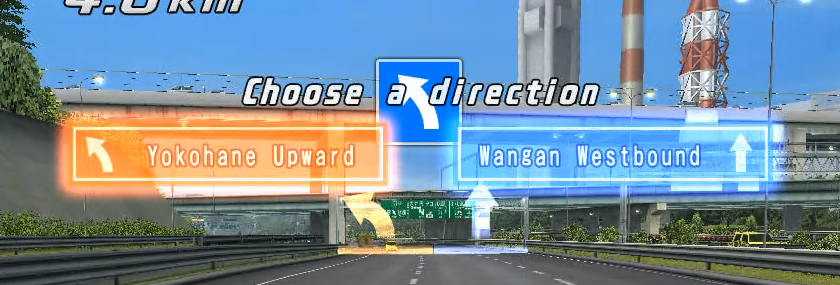
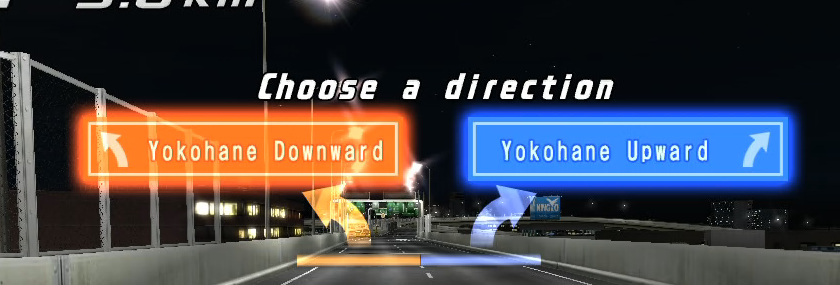
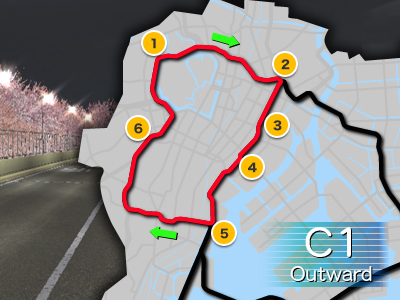
In VS Player mode, there is a "Free Branching System". The car that reaches the branching point first can decide whether the race will continue to the left or to the right. Here is an introduction to the branches you can select at each junction.
C1 Area
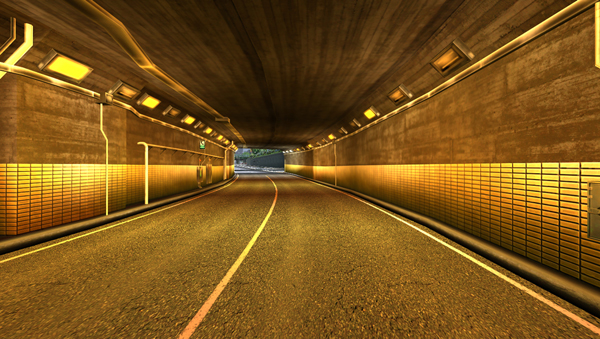
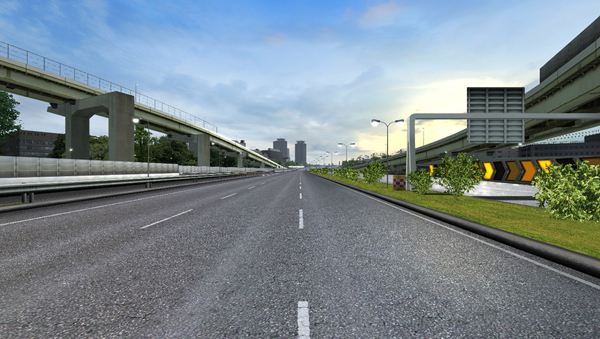
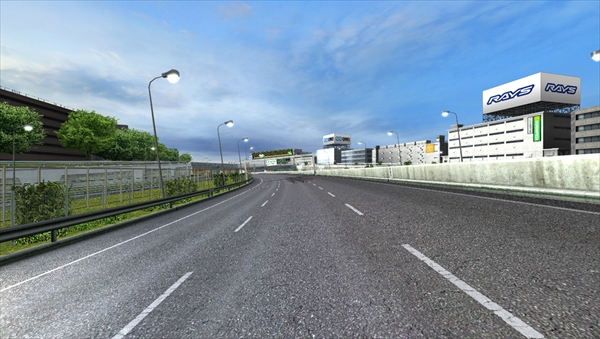
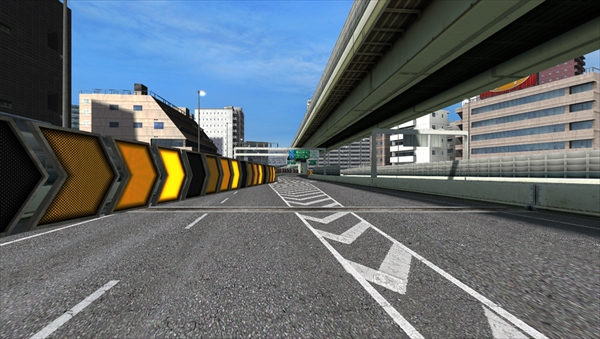
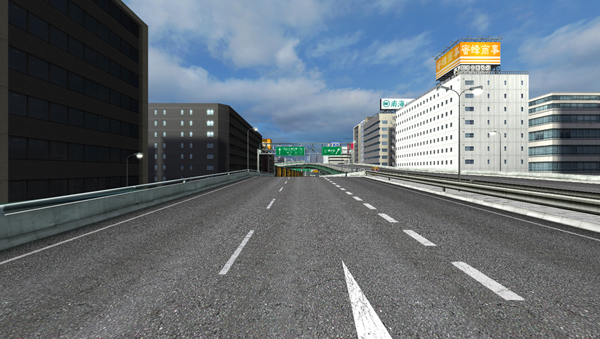
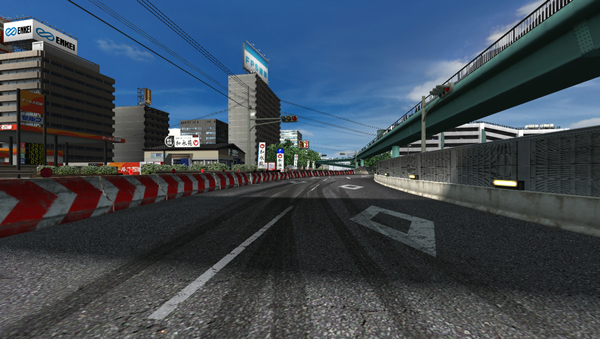
An this course, big and small corners seem to appear from between the characteristic buildings such as Tokyo tower and buildings in Shiodome.
New Belt Line Area
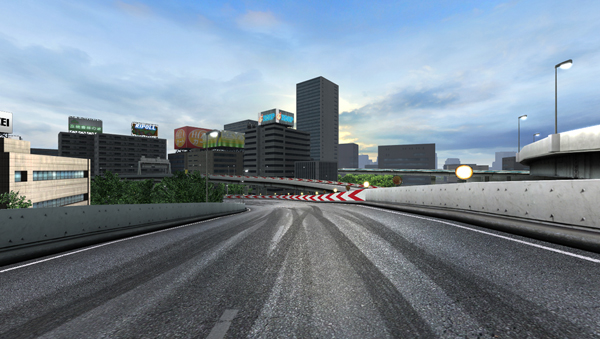
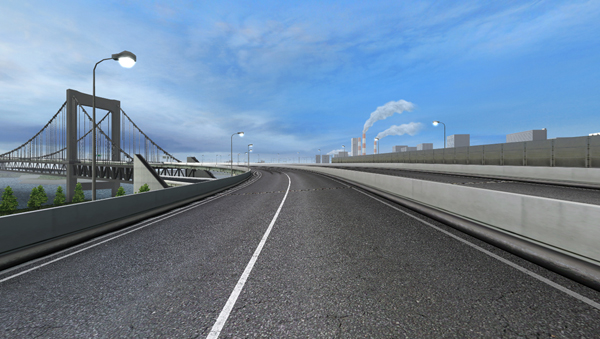
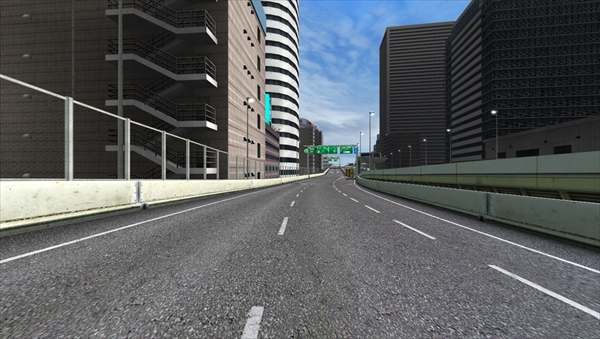
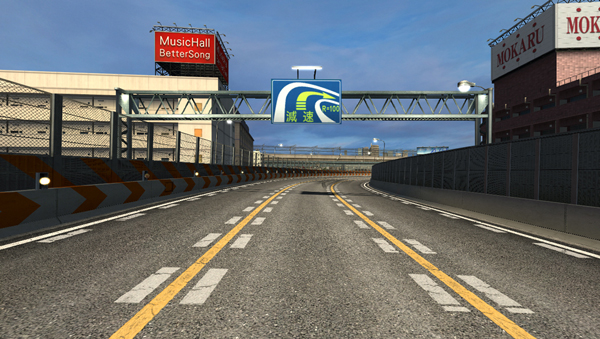
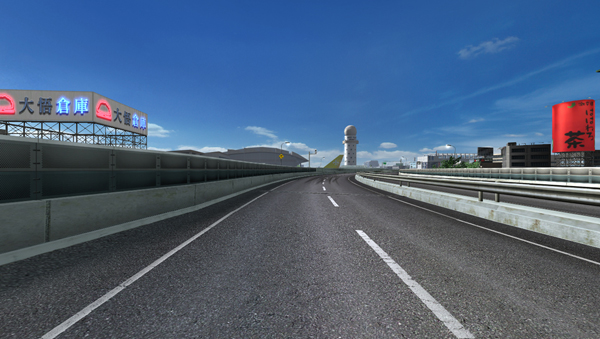
This area is highly recommended if you want to enjoy Wangan World's "Battle in Ultrahigh Speed Area".
Not only does this course have straight lines and high speed corners, but there is a good balance in the intervals between the technical corners.
NEW
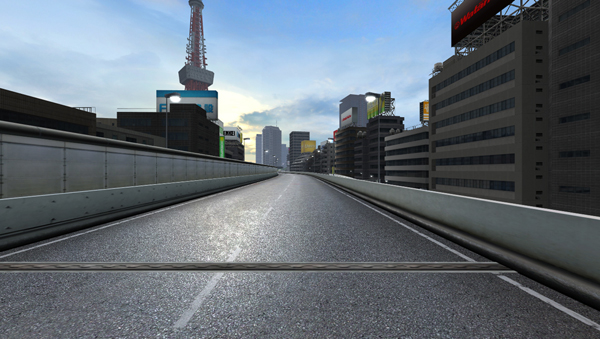
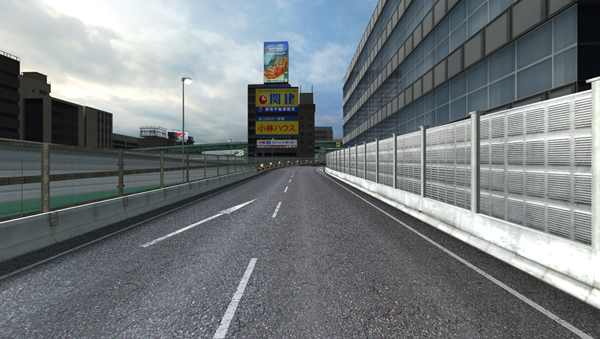
Sub-center(Shibuya/Shinjuku) Area
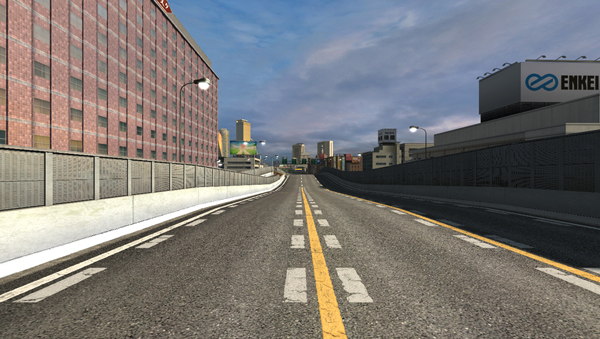
Passing through the Shibuya/Shinjuku area, this is a well-balanced course that has a good mixture of both straight stretches and areas with twists and turns.
NEW
Sub-center(Ikebukuro) Area
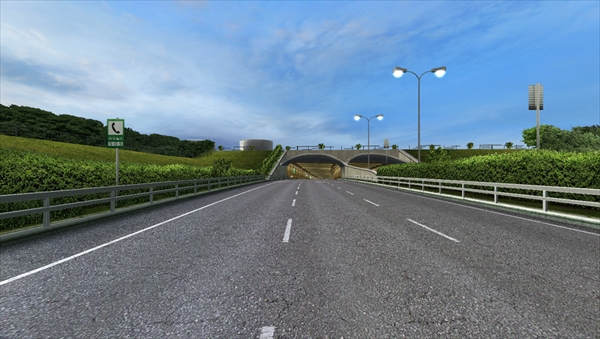
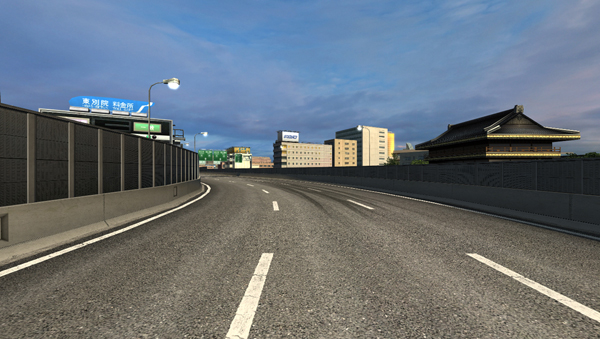
Including a section with a number of chicanes, this course passes through the lengthy Yamate Tunnel and makes a full round skirting the Shinjuku and Ikebukuro areas.
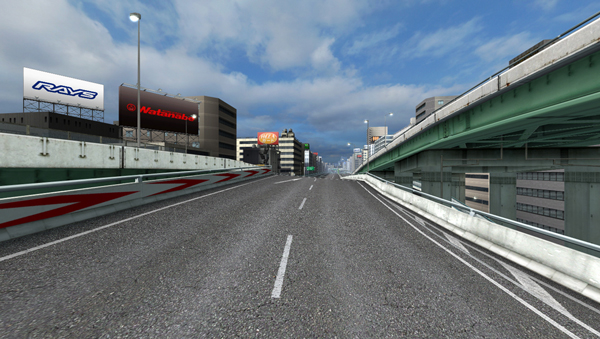
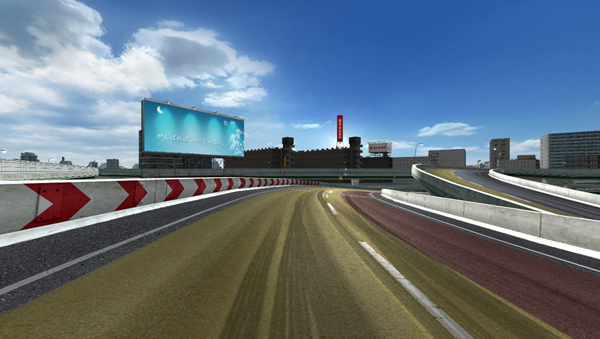
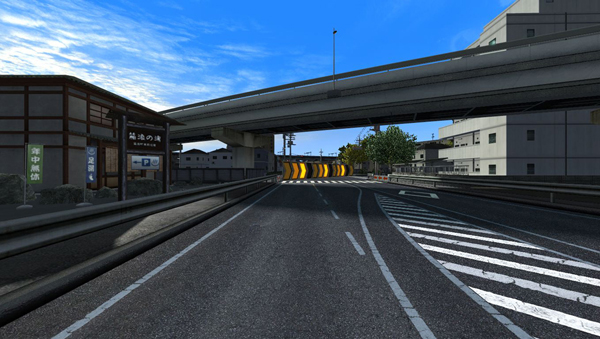
Wangan Area
An ultra long straight street with wide lanes for tens of kilometers!
Sharp judgment and true power are required to defeat jostling official cars on the road.
Yokohane Area
An area in Kanagawa which requires toughness and high speed.
Gentle corners appear rhythmically.
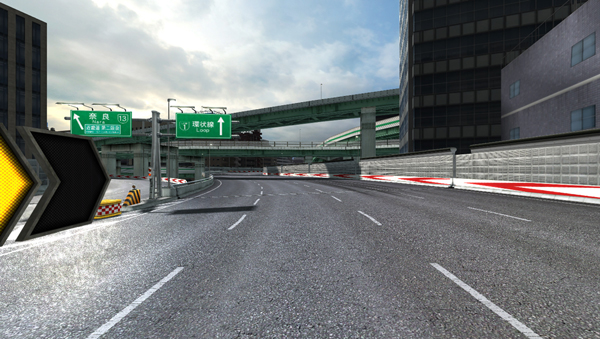
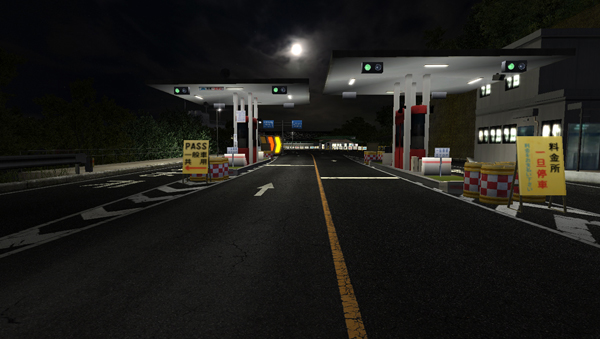
Yaesu Area
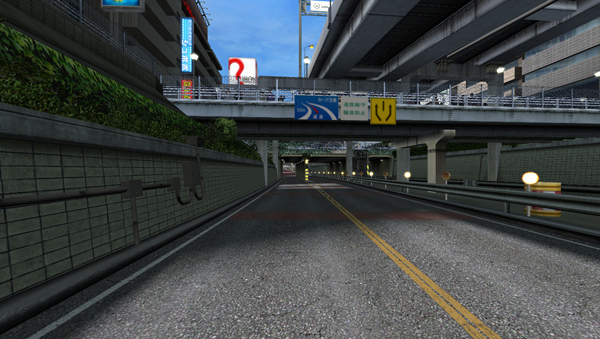
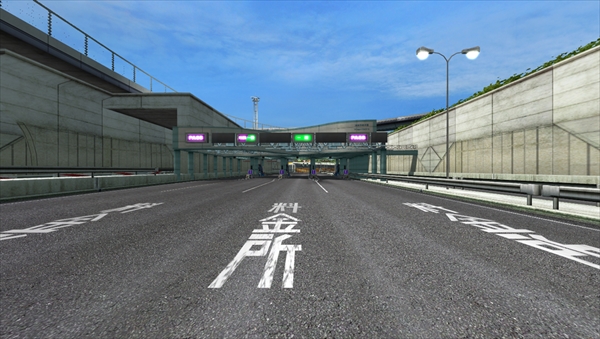
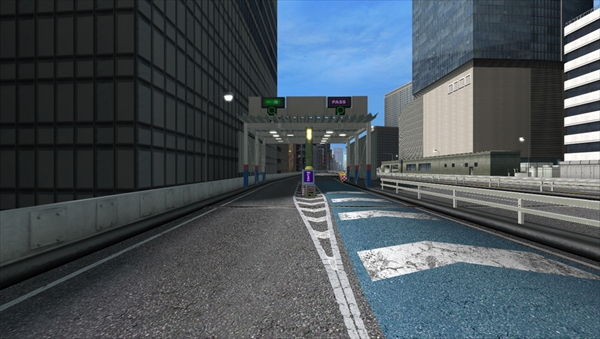
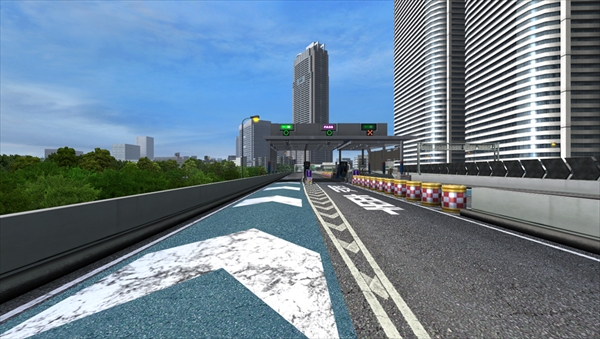
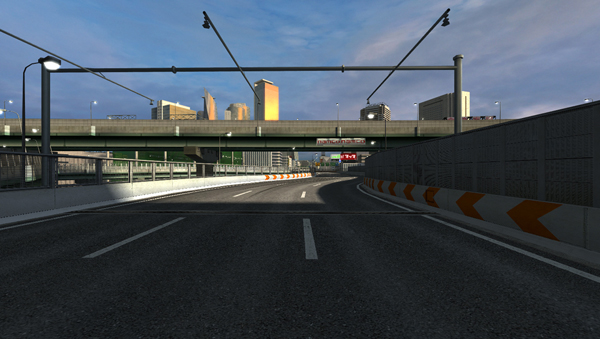
Passing high over C1, going through narrow groups of buildings and underground passages, this is a tight, technical area. There are many tricky traps such as toll gates and more!
Yokohama Area
An area in Kanagawa which requires toughness and high speed.
Gentle corners appear rhythmically.
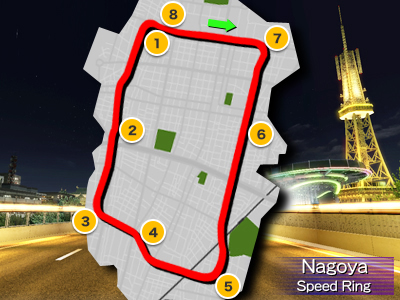
Nagoya Area
his high-speed course, with its characteristic undulating road and big hills and troughs, runs clockwise round the heart of Nagoya City.
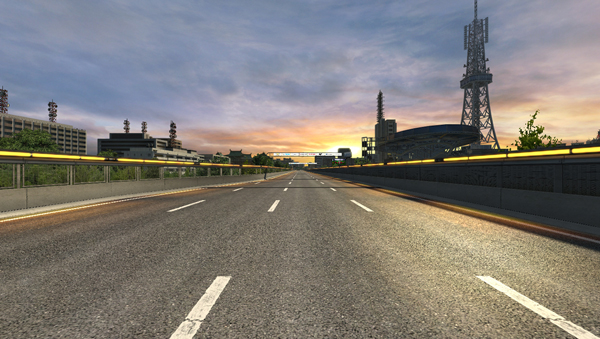
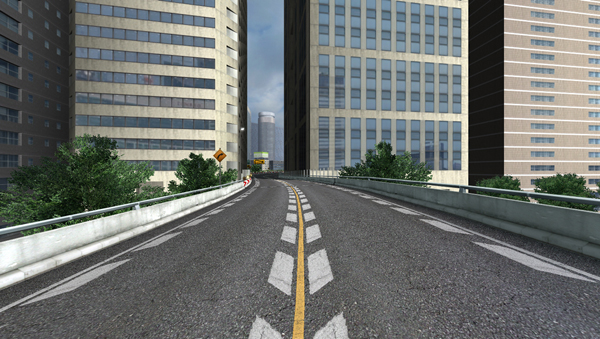
Osaka Area
A high-speed technical course in the Osaka urban area.
Unique corners are connected by long straight lines.
NEW
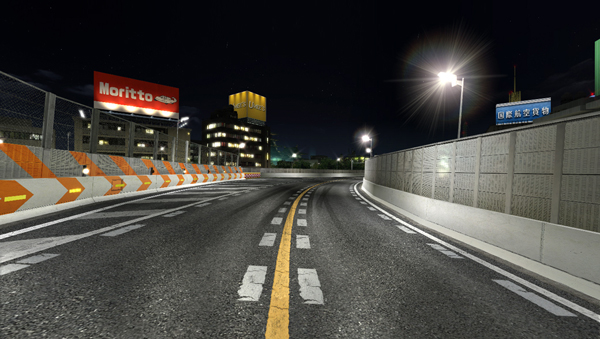
Kobe Area
A challenging high-speed route, this course weaves a tricky trail through the famous scenery of the port city Kobe.
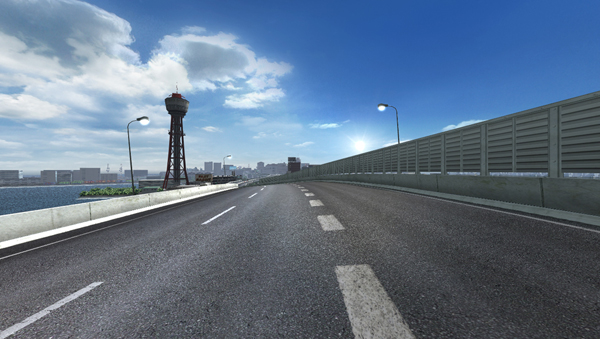
Fukuoka Area
An exhilarating high-speed zone course which provides a variety of landscapes. Run through ups and downs while undulating left and right at a fast speed.
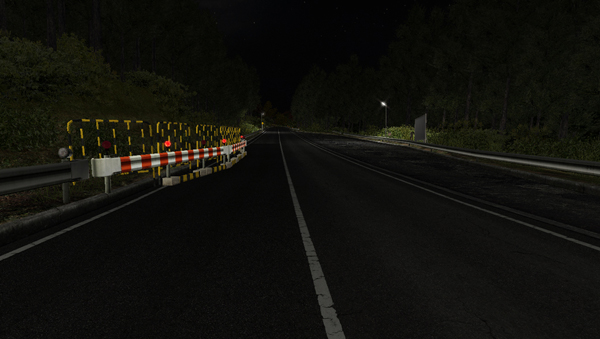
Hakone Area
Low-speed corners appear sequentially from between mountains with big height differences.
This is a thrilling technical course.
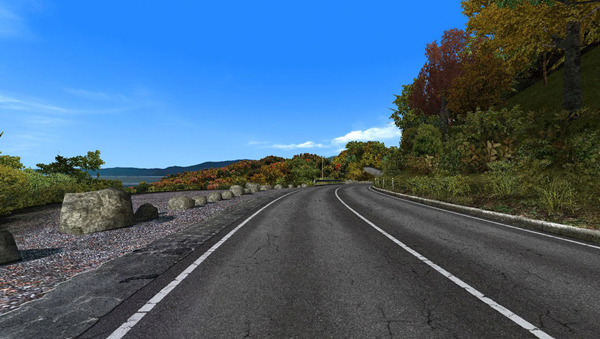
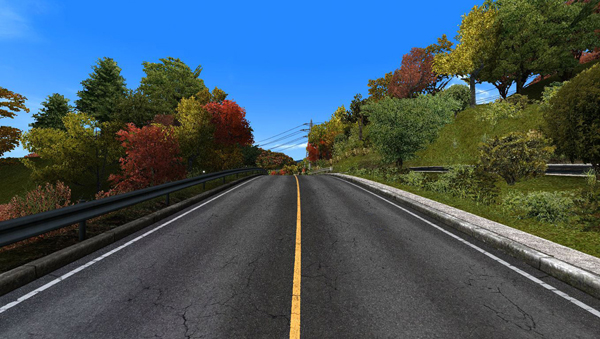
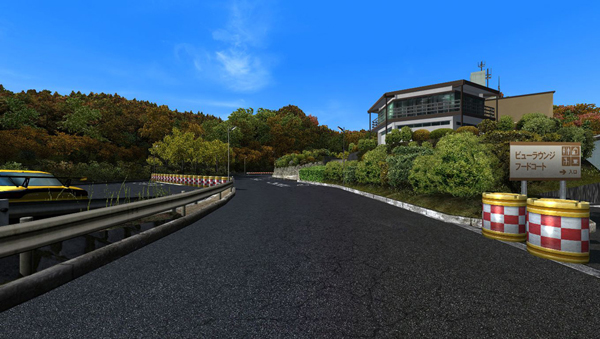
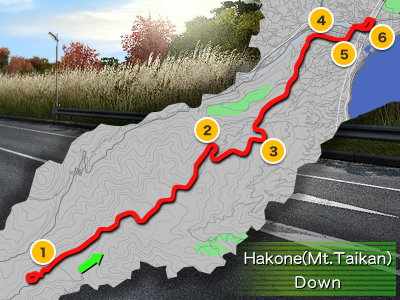
Hakone(Mt.Taikan) Area
You’ll encounter challenging technical areas, with a barrage of typical mountainous-area corners showing up in high-speed ranges.
Metro Hwy (Tokyo)
An ultra long course that uses all the metropolitan Expressways in Tokyo area.
You may have to run through the districts you have never seen.
Metro Hwy (Kanagawa)
An ultra long, ultra high-speed course that consists of only high-speed areas such as the Yokohane Line and Wangan Line!
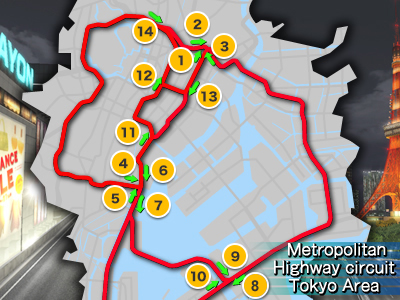
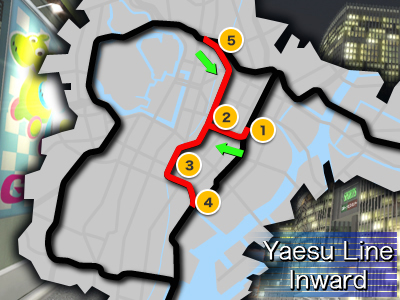
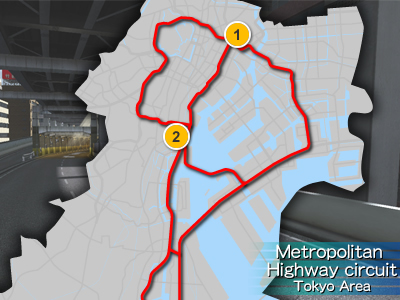
VS Player and free Branching System Guide
VS Player and free Branching System Guide:Tokyo Area
Course Guide
1.Edobashi JCT: C1_Inward, from Ginza
Left:Technical area heading to "C1_Inward"
Right:
High speed area heading to "New Belt Line (clockwise)"
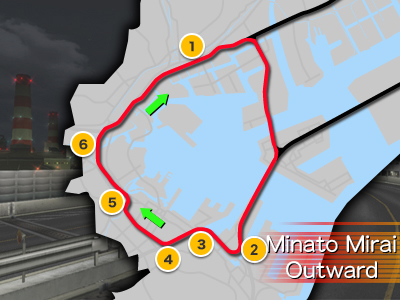
2.Edobashi JCT: C1_Outward, from Kandabashi
Left:
High speed area heading to "New Belt Line (clockwise)"
Right:
"C1_Outward" heading to Ginza with continuous tight corners.
3.Edobashi JCT: New Belt Line (counter-clockwise), from Hakozaki
Left:
"C1_Outward" heading to the Ginza area with continuous tight corners.
Right:
Technical area heading to "C1_Inward"
4.Hamazakibashi JCT: C1 inner, from Shibakoen
Left:
"C1_Inward" heading to the Ginza area with continuous tight corners.
Right:
Area with many straight lines heading to "Yokohane Line [Downbound]"
5.Hamazakibashi JCT: From Yokohane Line
Left:
C1_Outward with a variety of continuous corners
Right:
C1_Inward heading to the tight Ginza area
6.Hamazakibashi JCT: C1_Outward, from Ginza
Left:
Towards Yokohane and Wangan Line with many straight lines
Right:
Technical "C1_Outward"
7.Shibaura JCT: Downbound branching point
Left:
"Route 11 Daiba Line" leading to Wangan Line
Right:
Area with continuous easy corners heading to "Yokohane Line Downbound"
8.Ariake JCT: From Tatsumi
Left:
Area heading to "Route 11 Daiba Line" with gradually-increasing number of corners
Right:
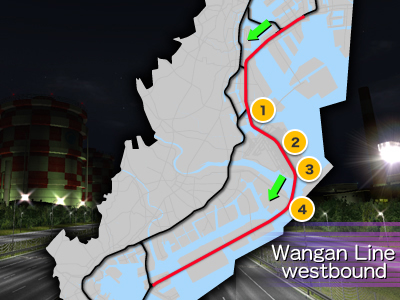
High speed area heading to "Wangan Line (westbound)"
9.Ariake JCT: From Daiba Line
Left:
Area heading to Route 9 Fukagawa Line with continuous easy corners
Right:
Area heading to Wangan Line with a long straight line
10.Ariake JCT: From Tokyo Port Tunnel
Left:
Daiba Line (to C1) with a gradually-increasing number of corners
Right:
Area heading to Wangan Line with a long straight line
11.Shiodome JCT: from C1 Outward, Hamazakibashi
Left:
Tight road toward Yaesu Line
Right:
Twisty road toward Ginza面
12.West Ginza JCT: Yaesu Line Upbound
Left:
Tunnel toward Yaesu
Right:
Sequence of right angles toward Edobashi
13.Kyobashi JCT: from C1 Outward, Edobashi
Left:
Twisty road toward Ginza
Right:
Tight road toward the Yaesu Line
14.Kandabashi JCT: from C1 Outward, Takebashi
Left:
Twisty road toward Ginza
Right:
Tight road toward the Yaesu Line
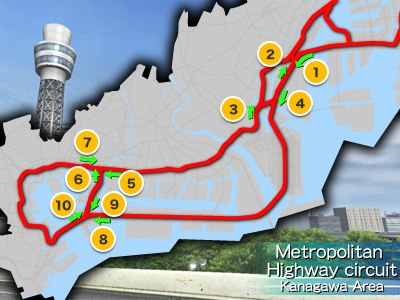
VS Player and free Branching System Guide:Kanagawa Area
Course Guide
1.Ohi JCT: Wangan Line (westbound), from Tokyo Port Tunnel
Left:
Area heading to "Yokohane Line Upbound" where you turn round at the tight corner and return to the center of the capital city
Right:
"Area heading to Wangan Line (westbound)" with a long straight line
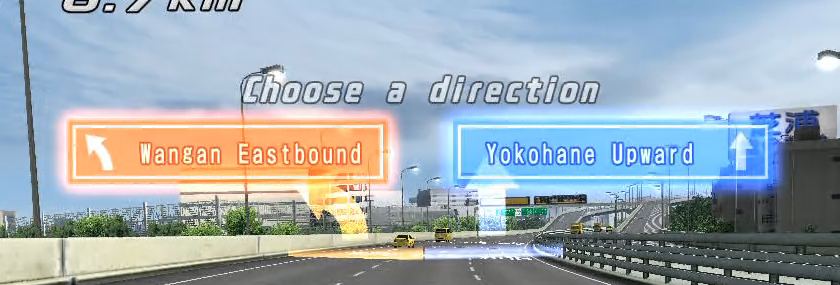
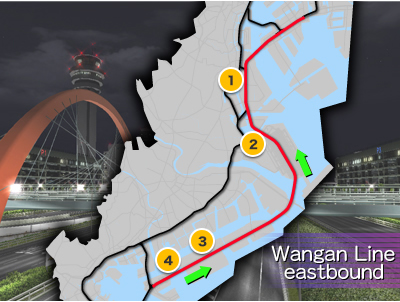
2.Ohi JCT: Wangan Line (eastbound), from Ohi Tollgate
Left:
Area heading to C1 in the capital city, passing through a narrow corner to join the Yokohane Line
Right:
Area heading to Wangan Line area with a long straight line
3.Showajima JCT: Yokohane Line Upbound, from Haneda Tunnel
Left:
Area heading "Wangan Line (eastbound)" by passing the tight corner and heading to the long straight line zone.
Right:
Area heading to "Yokohane Line Upbound" with continuous easy corners
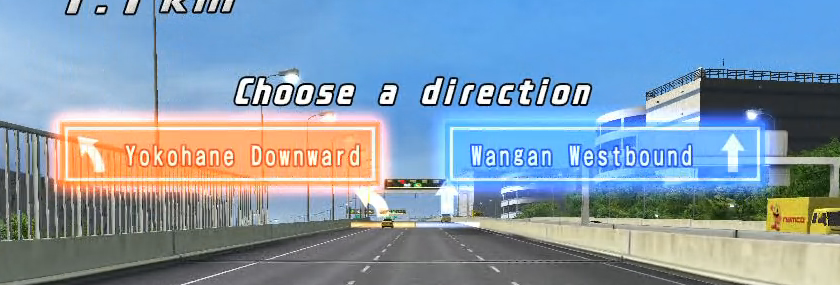
4.Tokai JCT: Wangan Line (westbound) from Ohi PA
Left:
Area heading to Yokohane Line with continuous easy corners
Right:
Area heading to Wangan Line with a long straight line
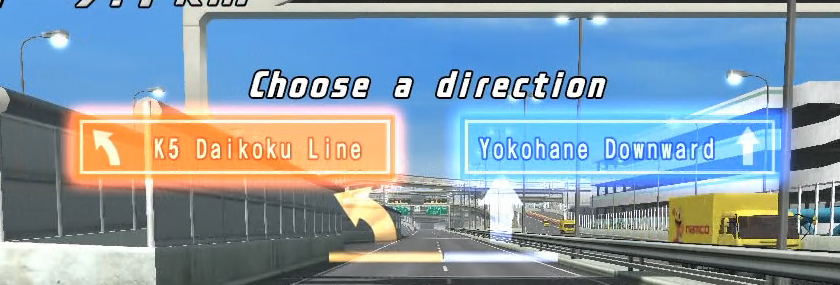
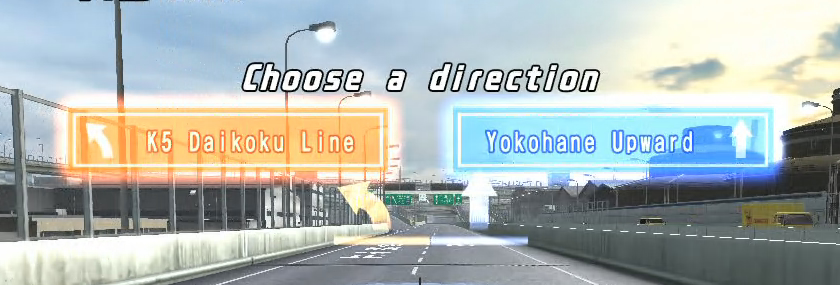
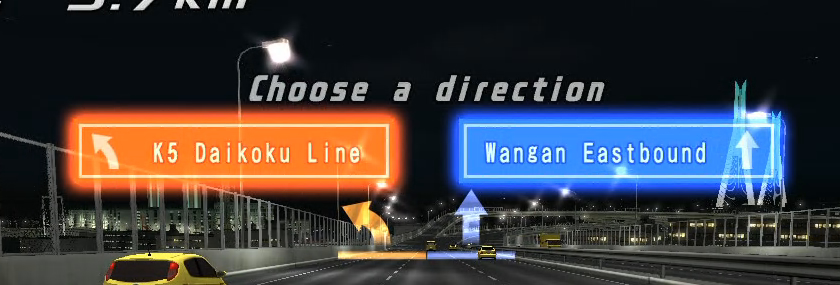
5.Namamugi JCT: From the K5 Daikoku Line
Left:
To the K5 Daikoku Line - a byroad to the Wangan Line straightaway area
Right:
To Yokohama Line Downbound, with many loose corners
6.Namamugi JCT: From the K5 Daikoku Line
Left:
To Yokohama Line Downbound, with many loose corners
Right:
To the tight high speed area Yokohama Line Upbound
7.Namamugi JCT: From Yokohama Station
Left:
To the K5 Daikoku Line - a byroad to the Wangan Line straightaway area
Right:
To the tight high speed area Yokohama Line Downbound
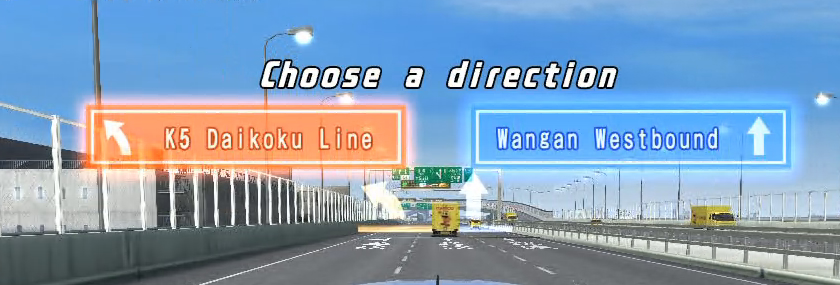
8.Daikoku JCT: From the Wangan Line (westbound)/Haneda Airport
Left:
To the K5 Daikoku Line, a straight area with many high speed corners
Right:
To the Wangan Line (westbound) heading to the Minato Mirai area via the Bay Bridge
9.Daikoku JCT: From the K5 Daikoku Line
Left:
To the Wangan Line (westbound) heading to the Minato Mirai area via the Bay Bridge
Right:
To the super high speed straightaway area Wangan Line (eastbound)
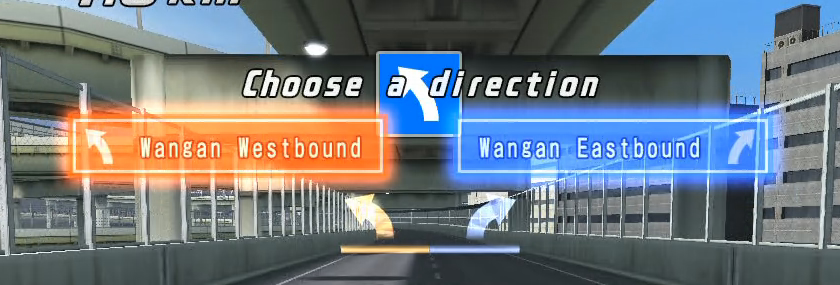
10.Daikoku JCT: From the Bay Bridge
Left:
To the K5 Daikoku Line, a straight area with many high speed corners
Right:
To the super high speed straightaway area Wangan Line (eastbound)
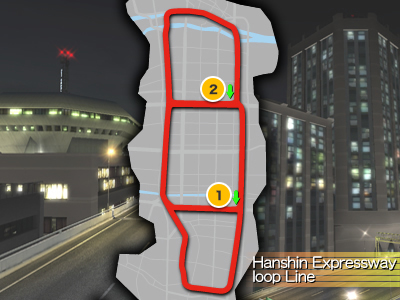
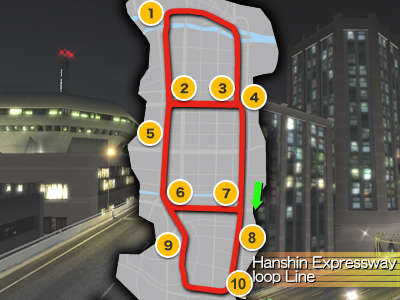
VS Player and free Branching System Guide:Hanshin Expressway loop Line
Course Guide
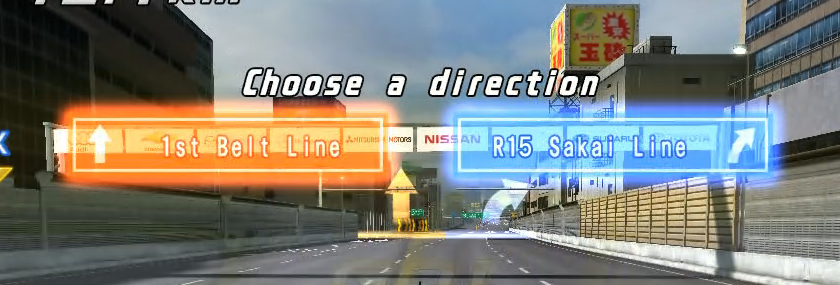
1.Sakai Line branch
Left:
To the Ebisubashi on the Route 1 Loop Route with an extremely narrow road
右:
The wide Route 15 Sakai Line
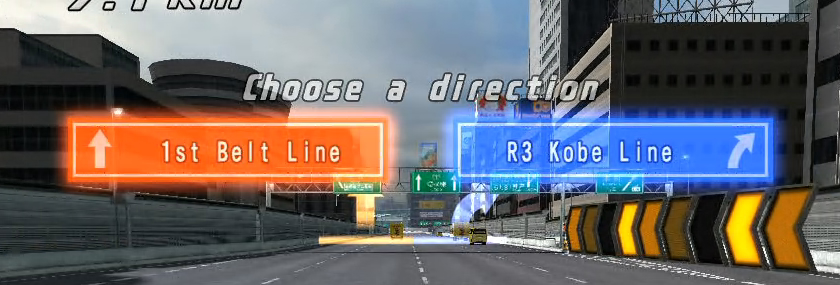
2.Kobe Line Branching point
Left:
"Route 1 Loop Line" heading to Dotonbori with continuous high speed areas
Right:
"Route 3 Heading to Kobe Line" with narrow corners
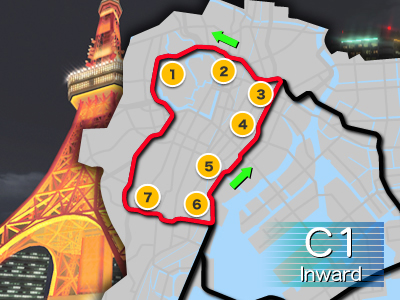
C1 Area
C1 Inward
Total Length:13.8km
Characteristics
This course surrounds the center of Tokyo.
You can enjoy seeing scenes from the capital city such as business centers, Ginza, long tunnels and Tokyo Tower.
Course layout
Many big and small corners appear in front of you in sequence, and you might see the bridge piers on the streets of Ginza.
This course layout is full of variety, and the more advanced your tuning gets, and the faster the average speed of your car gets, the more difficult the corners will become.
If you are not familiar with this course, we recommend focusing on handling tuning in order to complete the difficult corners.
Course Guide
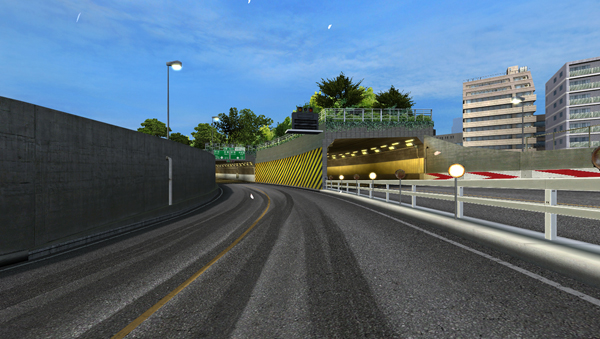
1.Entrance to Chiyoda Tunnel
You should drop speed and run carefully through the tight corner.
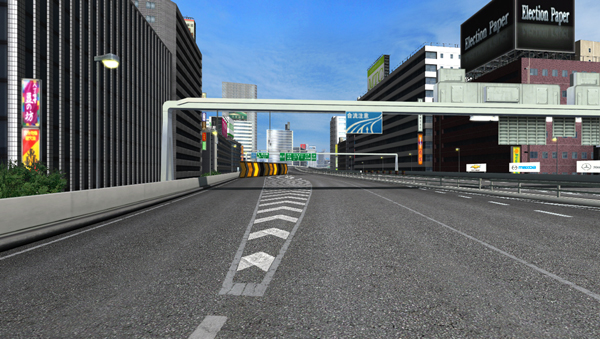
2.Around Kandabashi
Right and left corners appear in succession between the buildings in the business district.
Although most of the corners are easy, you should be careful not to lose control of the steering on the rough road.
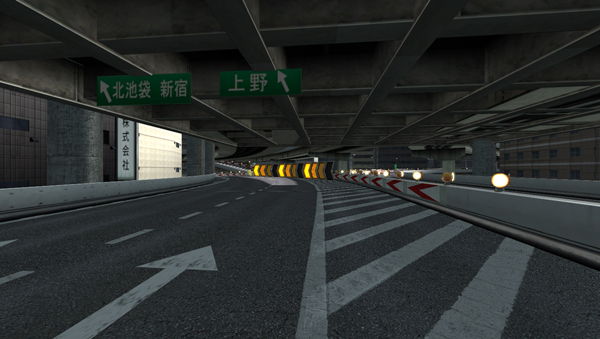
3.Edobashi Branching, C1_Inward Side
A difficult area that requires hard braking!
The corners get harder and harder, so you should get into the inner lane a little later so you can get out of it easily.
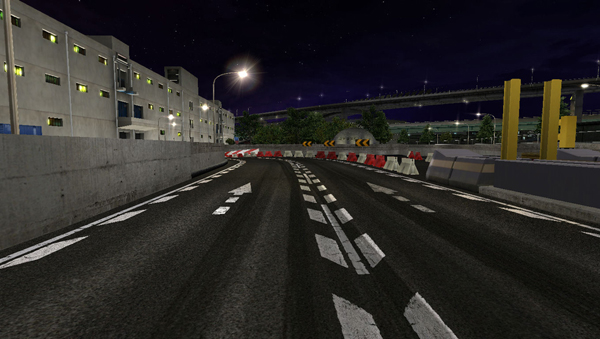
4.Ginza Area Northbound, Latter Half
A thrilling point with three successive bridge piers! If you run smack into the bridge pier, you'll waste a lot of time. It may be better to crash into the wall. Just before the last bridge pier is the top of the slope, so you may lose control over your car at this mega-difficult point!
Make sure to keep your speed down until you are familiar with this tricky spot.
5.Ginza Area Northbound, First Half
The concrete surrounding the course makes it oppressing and difficult Finding the best line is vital at the successive tight S-shaped corners.
6-1.Hamazakibashi Branching, C1_Inward Side
This sharply dropping road makes you lose the feeling of the ground. Do not race too fast!
If your positioning and car control are perfect, you can feel good driving through at high velocity.
6-2.Hamazakibashi Branching, C1_Inward Side
When you can see the monorail you're almost there!
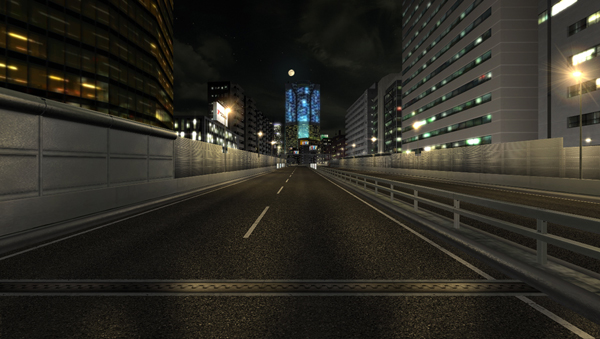
7.Tokyo Tower
A Tokyo landmark, Tokyo Tower.
Check out the illuminated scenes at night.
C1 Outward
Total Length:13.8km
Characteristics
This course is basically the same as C1 inner in that the course runs through characteristic buildings in the capital city.
However you will see a different face of the city, as you will be coming from the opposite direction.
Course layout
It is basically very similar to C1_Inward, however, it is slightly different; the car's average speed is a little higher, and there are many double corners that are key points for winning the race.
Control over cornering is vital in the C1 areas, so you should focus on handling tuning.
Course Guide
1-1.Exit of Chiyoda Tunnel
There is a very tight corner, so you need to open the throttle or brake in order to change the car's direction.
You do have to maintain your concentration at the next corner as well.
"Out of the frying pan into the fire". Keep this phrase in mind.
1-2.Exit of Chiyoda Tunnel
Players tend to lose their concentration at this point. You should take care until you have passed through.
2.Edobashi Branching, C1_Outward Side
Sharp double apex corner.
Step on the brakes hard and reduce your speed.
3.Ginza Area Southbound, First Half
In this area, three bridge piers appear in succession. Especially after the first one, you will be facing a sudden difficult corner!
This corner will be easy if you run over the bridge from the left side.
4.Ginza Area Southbound, latter Half
Two hard S-shaped corners appear in succession.
You should be careful at the S-shaped corner in Shiodome Tunnel because the second corner is very difficult.
5.Hamazakibashi Branching, C1_Outward Side
Tight corner heading to Tokyo Tower area.
You can pass through easily by reducing your speed.
6.Exit of Kasumigaseki Tunnel
Be careful not to lose the feeling of the ground at the top of the slope!
If you drive through too fast, you may lose control, so you need to race carefully.
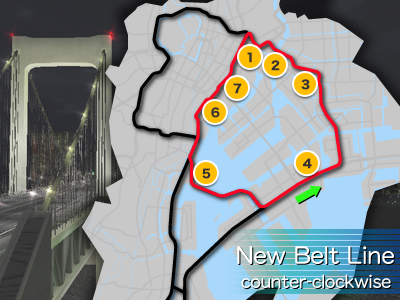
New Belt Line Area
New Belt Line(counter-clockwise)
Total Length:17.5km
Characteristics
There are a lot of high speed areas, such as Route 9 Fukagawa line, Route 11 Daiba line and Wangan Line. The range of speed in Wangan Line is extremely high because of its long straight roads.
You can run though the Expressway's new spot - Rainbow Bridge - in this course.
Course layout
Because the Ginza area, with its difficult corners, appears between high-speed areas, you have to consider the balance of these different areas in your tuning.
If you focus on tuning for straight roads, you will have to compete at the narrow Ginza area using just your driving skills!
Course Guide
1.Edobashi Branching, New Belt Left
Very difficult area with a small radius and doubled layout.
Drop your speed and make a plan for positioning and passing through.
2.Hamazakibashi Branching, towards the City Center
There is a tight corner near the entrance, but you can pass through the exit at high velocity.
3.Route 9 Fukagawa line
The Fukagawa line runs straight through a residential area.
Some middle-speed corners will appear between the straight lines.
This is where you show your racing skill!
4.Wangan Line, to Tatsumi
You can drive fast on this long straight line.
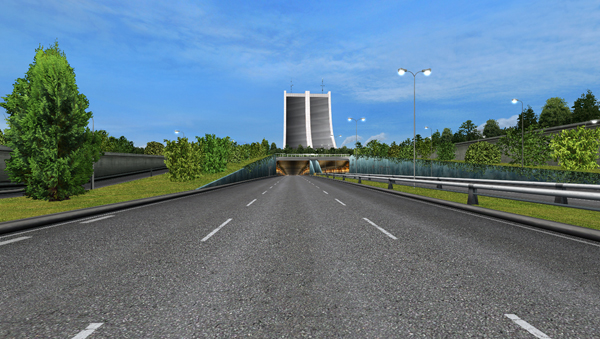
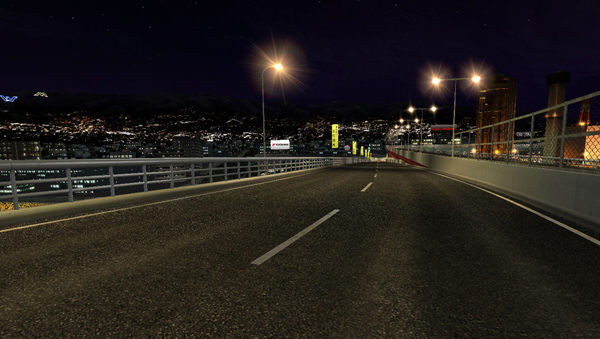
5.The Approach to Rainbow Bridge
On the Approach to Rainbow Bridge, you will find beautiful fireworks.
But there is a sharp double corner at the exit. Be careful not to be caught in this trap.
Get into the inner lane a litter later!
6.Ginza Area Southbound, latter Half
Two hard S-shaped corners appear in succession. You should be careful at the S-shaped corner in Shiodome Tunnel because the second corner is very difficult.
7.Ginza Area Southbound, First Half
In this area, three bridge piers appear in succession. Especially after the first one, you will be facing a sudden difficult corner!
This corner will be easy if you run over the bridge from the left side.
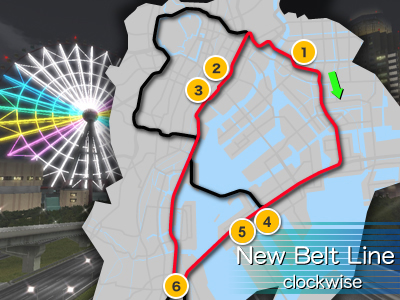
New Belt Line (clockwise)
Total Length:22.8km
Characteristics
The Wangan Line is the ultimate in long straight roads, and you will need to race faster here than on any other course.
This course is perfect if you want to feel the tension that comes with ultra high speed! There is a huge variety of scenery, like Tokyo Port tunnel, the factory areas, and the fascinating Daiba
Course layout
The Wangan Line requires true power, and deciding how and when to overtake official cars is essential for winning here. And how you race in the technically difficult Ginza area that appears between high speed areas is a key to winning.
Course Guide
1.Near the Kiba exit
And the picture shows a double corner with a tight exit.
If you get into the inner lane too fast, you will be crushed against the wall at the exit. Exact positioning is the key to winning here!
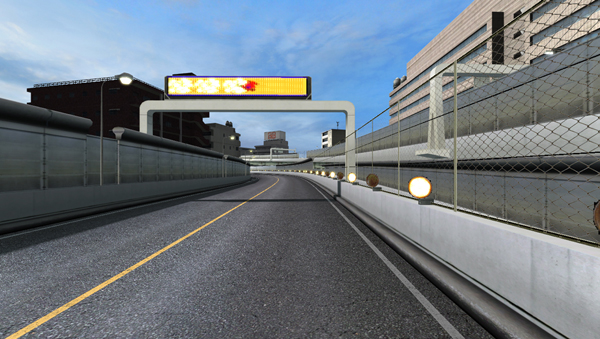
2.Ginza Area Northbound, Latter Half
A thrilling point with three successive bridge piers! If you run smack into the bridge pier, you'll waste a lot of time. It may be better to crash into the wall. Just before the last bridge pier is the top of the slope, so you may lose control over your car at this mega-difficult point!
Make sure to keep your speed down until you are familiar with this tricky spot.
3.Ginza Area Southbound, First Half
In this area, three bridge piers appear in succession. Especially after the first one, you will be facing a sudden difficult corner!
This corner will be easy if you run over the bridge from the left side.
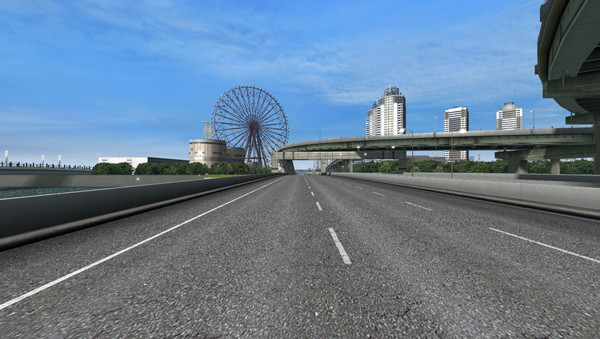
4.Wangan Line, to Ohi
Colorful Wangan Line with an illuminated Ferris wheel. This ultra high speed straight line requires true power!
Since there are so many official cars, Get ahead of them by using good judgment!
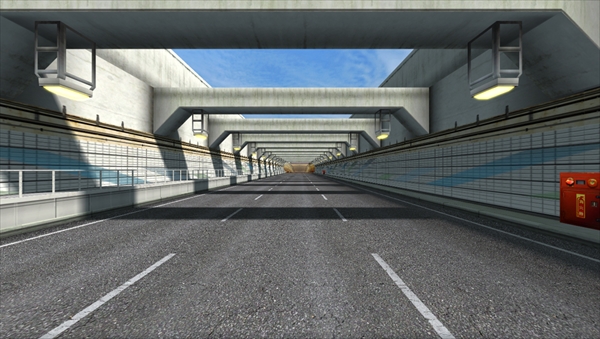
5.Tokyo Port Tunnel
1300m Harbor tunnel running under Tokyo Port. This is the famous spot where Kuroki said "My R is dying".
6-1.Ohi U-turn
Two linked tight corners create a U-turn. The slope at the first corner makes it difficult to see ahead. You need to be careful!
Your escape velocity at the second corner decides your speed at the next straight line.
6-2.Ohi U-turn
When the number of lanes decreases and a slope appears, the top of that slope will be a corner.
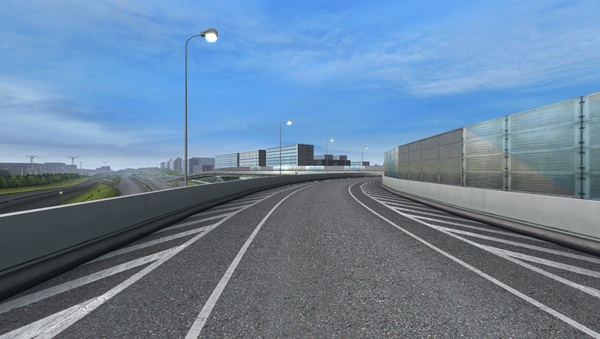
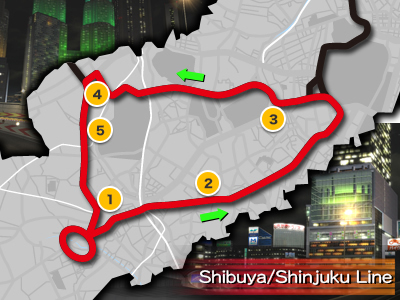
Sub-center(Shibuya/Shinjuku) Area
NEW
Shibuya/Shinjuku Line
Total Length:16.2km
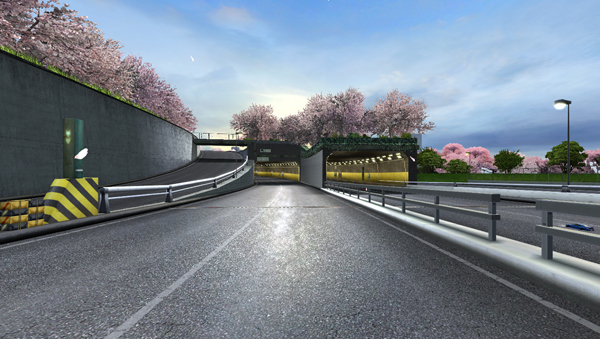
Characteristics
Going along Route 3 and 4 from the C1 district, this route connects Tokyo’s downtown, including Shinjuku, Shibuya, and Roppongi. You’ll be able to enjoy a wide variety of views—skyscrapers, downtown shops, and government offices contrasting with a long tunnel section.
Course layout
The most distinctive part of the course is the Ohashi Junction’s massive loop, which spirals in on itself countless times. Route 4 features a chain of tight sections that’ll put your handling to work, but over on Route 3 there are more than a few extra-long runs where your engine power will shine through. Your settings will vary depending on which one you want to put your strategic focus on.
Course Guide
1.S-section Before Ohashi Junction
Just before you plunge into the big loop, you’ll need to navigate the S-section. It twists along with a distinct rhythm, so commit this section to memory and make sure you’re comfortable with it.
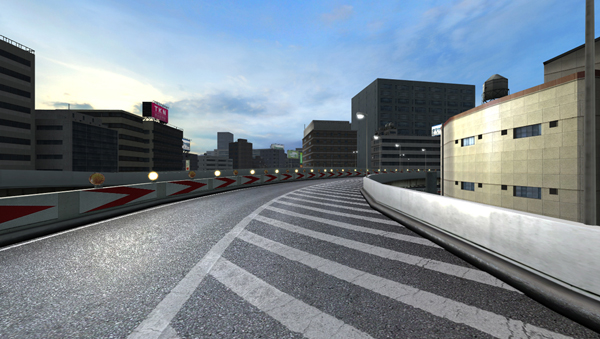
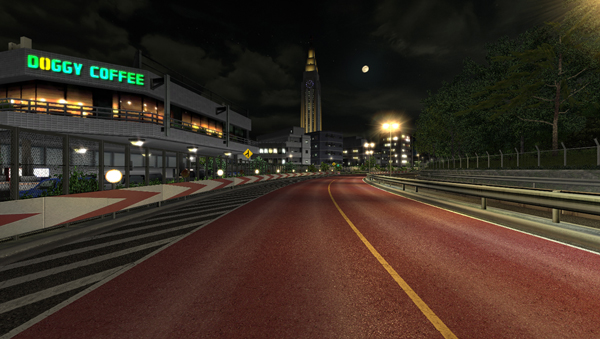
2.Near Takagicho
This is Route 3’s distinctive long, straight stretch. It cuts a straight line across Roppongi, so go all out at top speed!
3.Near Asasaka-Mitsuke
Found right after Route 4 opens up, this is a tricky, technical S-section. The two corners here curve differently, so make sure to plan for their best and worst points.
4.Shinjuku Junction
Never mind anything else: this is where the course gets narrow! This tight section breaks into right-angle turns, so kill your speed carefully to make your way through.
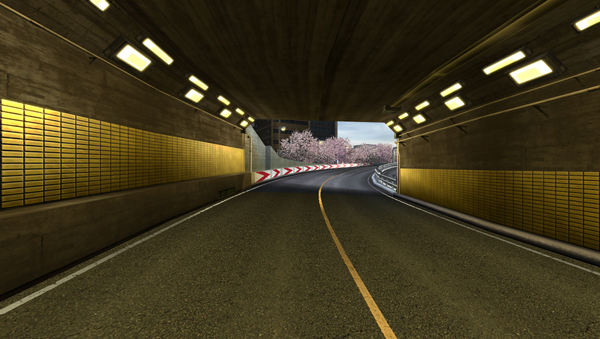
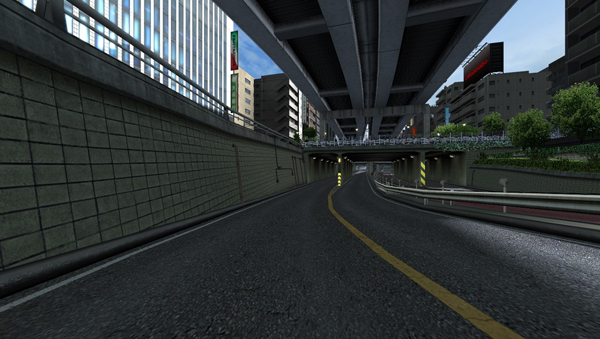
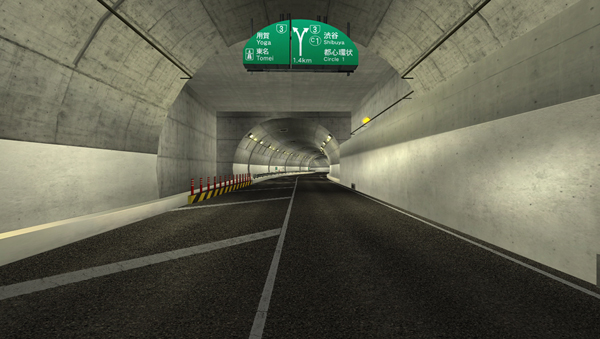
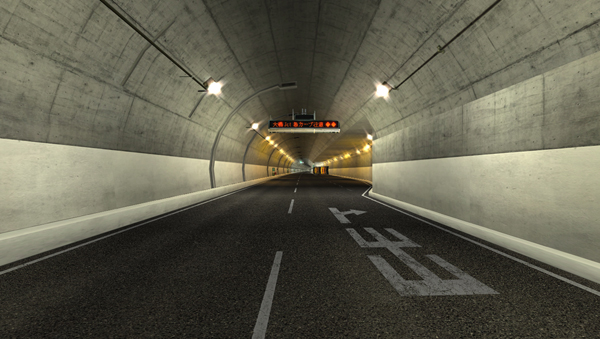
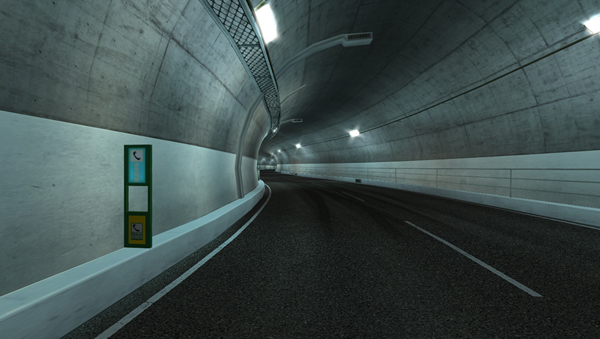
5.Yamate Tunnel / Toward Route 3
This tunnel stretches on for ages, so make sure you don’t crack under the pressure from the walls surrounding you.
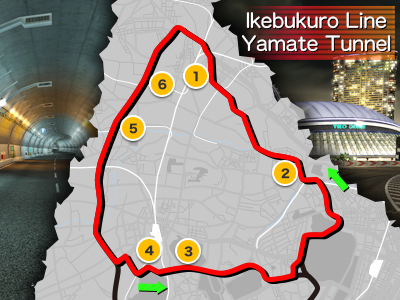
Sub-center(Ikebukuro) Area
NEW
Ikebukuro Line/Yamate Tunnel
Total Length:20.3km
Characteristics
Together with the stretching distance of the Yamate Tunnel, the calm and quiet of Route 5 as it begins to blend into the suburbs a little ways outside of the city give this course a distinct scenic character.
Course layout
Even though you’ll find a series of corners in the middle of Route 5 which demand a degree of skill, this is a chance to enjoy the rhythm of fast-car racing. The high-speed zone in the Yamate Tunnel is actually a “non-linear” section, meaning it has a slight twisting curvature that you’ll need to be on guard for.
Course Guide
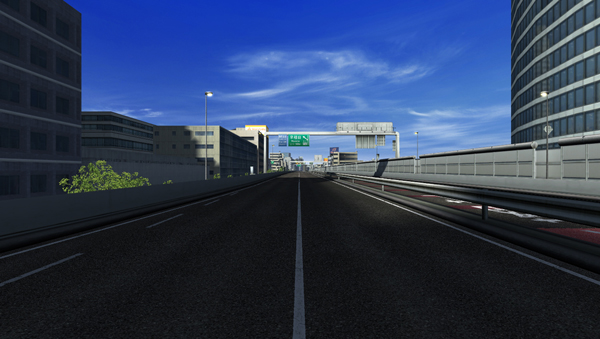
1.Near Waseda
A long straight stretch lined with gradual turns, you’ll have a good block of time to go full throttle here. Your best bet is to burn down this section at max power.
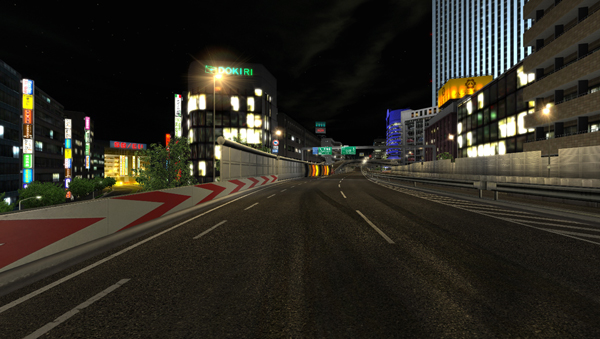
2.Higashi-Ikebukuro
This area is the center of the urban streets, with the glitter of department store neon and skyscrapers come night.
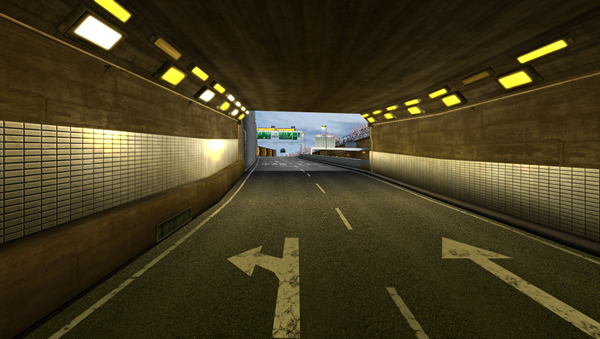
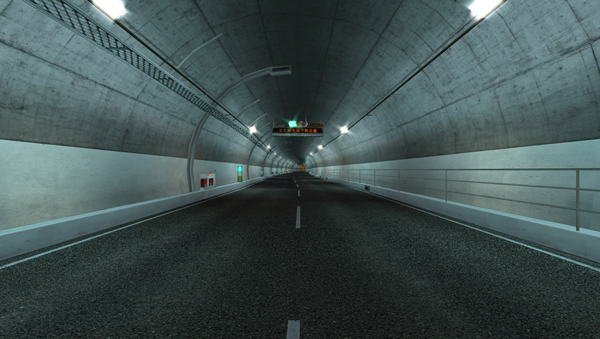
3.Yamate Tunnel / Toward Shinjuku
Though you can get up to a good speed in the tunnel, this section isn’t the straight shot you might think it is, so be careful not to make any careless mistakes.
4.Multiple S-sections
With three turns that are sharp only coming in and coming out, this compounded series of S-turns is incredibly tricky to pull off. Find a racing line and rhythm that’ll let you get through without dropping your speed.
5.Near Yoyogi
Once you’re past the buildings of the Shinjuku neighborhood, the route gets quite technical with a section twisting right then left. This is where drivers’ racing lines and machine control really make themselves known.
6.Near Gaien
Showing up in the space between technical corner sections, this is a long stretch that lets you take a bit of a breather. A railway line runs parallel beside the course, here.
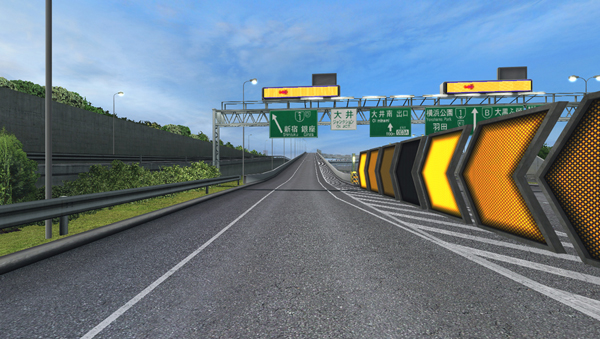
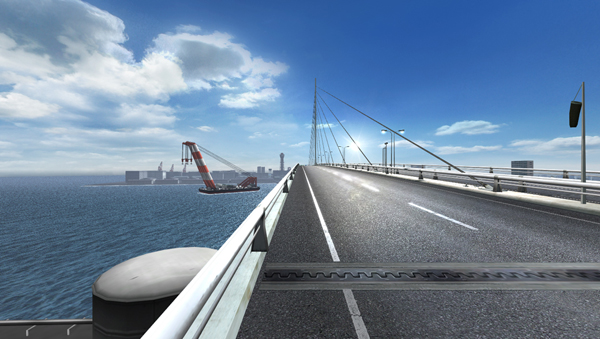
Wangan Area
Wangan Line(eastbound)
Total Length:21.6km
Characteristics
This line connects the port areas of Kanagawa and Tokyo.
This course has three lanes and is surrounded by giant buildings. The wide open spaces make for a liberating race.
Course layout
The straight road continues without end and your car's speed will get more than 300 km/ if it is fully tuned.
This is a truly ultra high speed course! Since the acceleration is extreme, you may fail in some asperities or be crushed if you are dropping your guard.
Course Guide
1.Ohi Tollgate
Entrance to the Tokyo area from the Metropolitan Expressway.
2.Airport Tunnel
Large tunnel running through under Haneda Airport. Sometimes you can see the sky through the gaps.
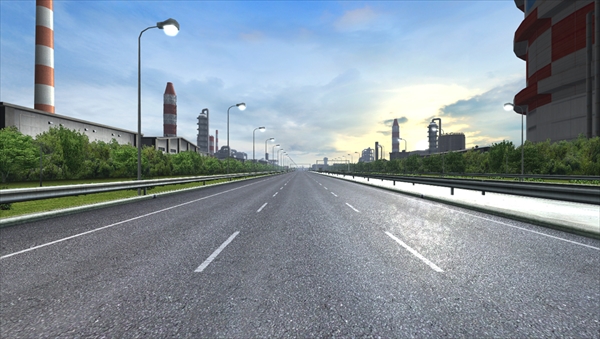
3.Near Ohgishima
Long long straight line with three lanes.
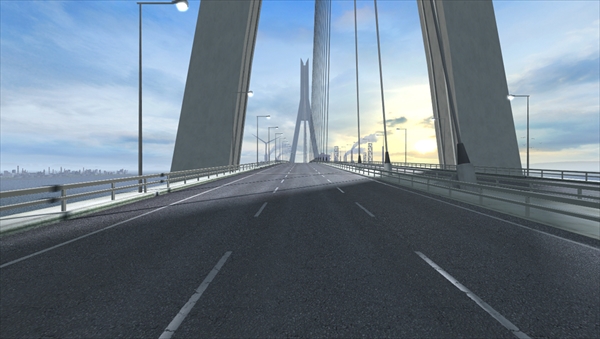
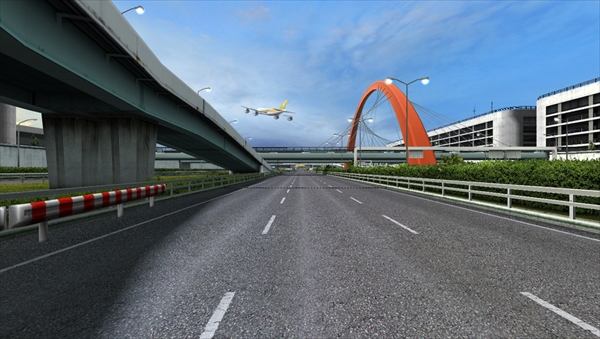
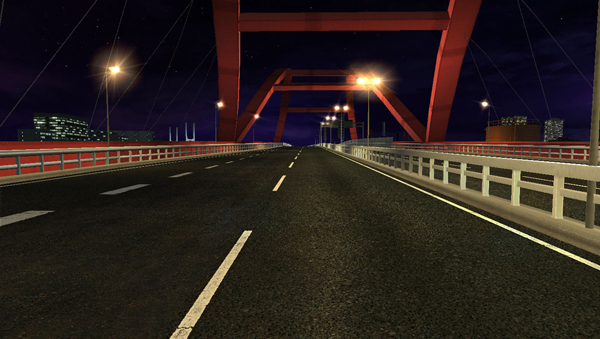
4.Tsurumi Tsubasa Bashi
Wangan Line is symbolized by this giant bridge.
Wangan Line(westbound)
Total Length:21.6km
Characteristics
Downbound line from Tokyo to Kanagawa. Just like Wangan Line upbound, this course has artificial structures like a giant bridge and a big tunnel.
Course layout
Just like the upbound course, this course has a long straight line with three large lanes.
When you're running out of time, or fighting a close battle, your skill at taking corners, even easy ones, will put you ahead of your rivals. It is essential to have good technique that lets you keep up your speed.
Course Guide
1.Approach to the Airport Tunnel
Banked corner with three lanes before the Airport Tunnel.
It's an easy course, so try to get through without making any mistakes.
2.Center of the Airport
Area running right through the center of the airport.
Sometimes you can see airplanes landing and taking off.
3.Tamagawa Tunnel
Long tunnel between Tokyo and Kanagawa.
It passes through the mouth of the Tamagawa River.
4.Ukima Tollgate
You can see the sky between the gaps in the tunnel.
The glimpses of sky are like taking a short break from the race.
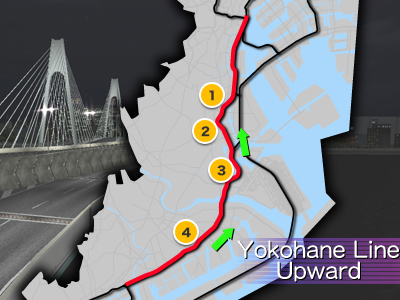
Yokohane Area
Yokohane Line Upward
Total Length:15.1km
Characteristics
This line cuts through downtown Kanagawa to the center of Tokyo.
Its characteristics are the large landscapes you will find near airports and riversides.
Course layout
Although this line is tight with only two lanes, there are many easy corners and straight lines, so it is relatively easy to plan a strategy to win in this course.
The corners may look hard, but you can run through most of them easily if your lane-positioning is exact.
Course Guide
1.Near Katsushima
Although you cannot see it from the course, The headquarters of "Bandai Namco Games", "Future Lab" is located around here.
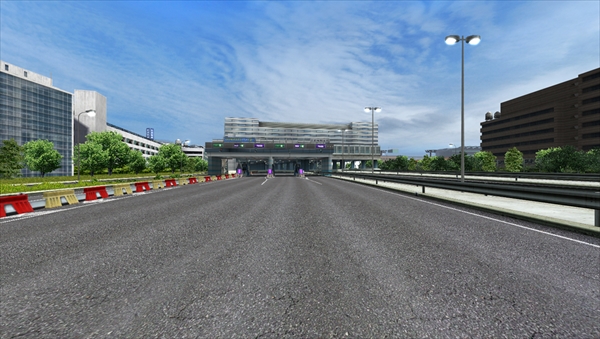
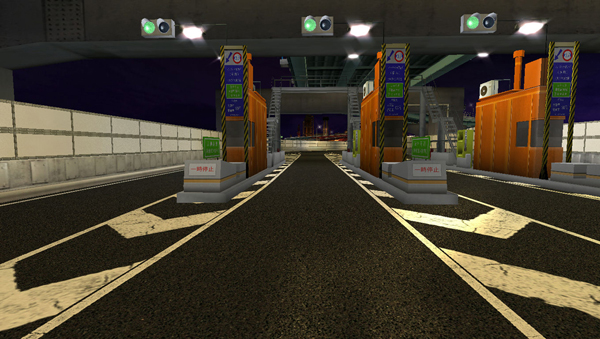
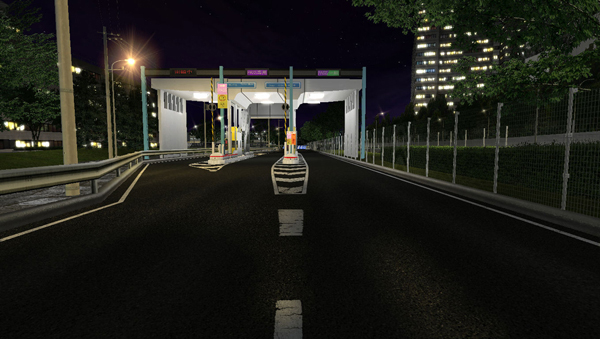
2.Heiwajima Tollgate
You can get on an easy line if you try to pass through the center tollgate.
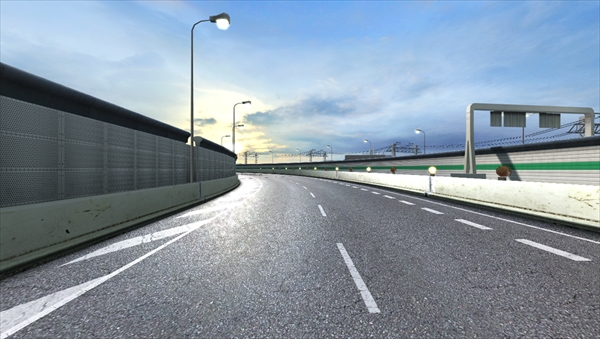
3.Approach to Haneda Tunnel
Banked corner with a steeply falling gradient. You may feel like you are leaning and dropping.
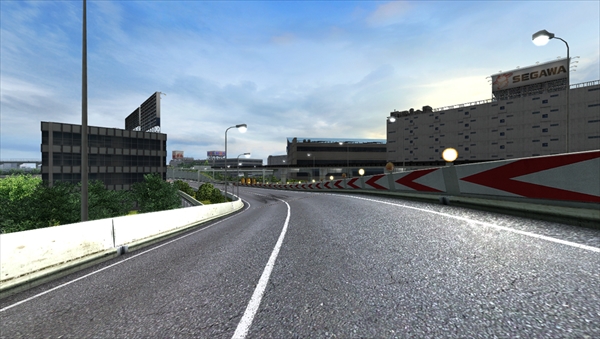
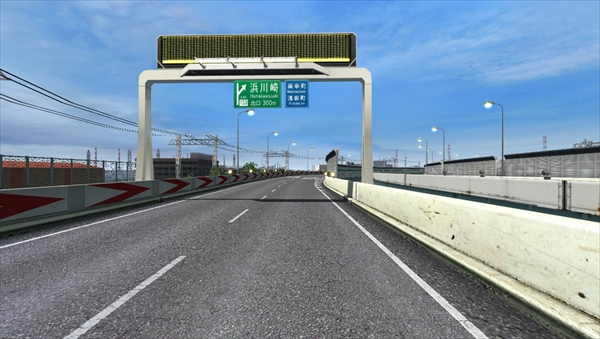
4.Hamakawasaki
Consecutive corners with slightly wide lanes.
You should pass through them by drifting boldly!
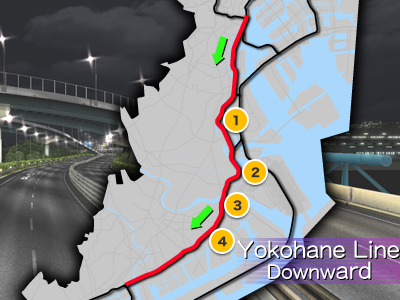
Yokohane Line Downward
Total Length:14.4km
Characteristics
Just like the Yokohane Line upbound, this line mainly runs through Kanagawa.
This course consists of easy corners that you can take at high speed.
Course layout
Basically, this course, just like the upbound course, is raced at high speed.
However, you need to be careful at the narrow Daishi tollgate in the middle of the course. And as it is in all the areas of Yokohane Line, if you focus on power tuning , even the easy corners will become difficult. You need to concentrate at all times!
Course Guide
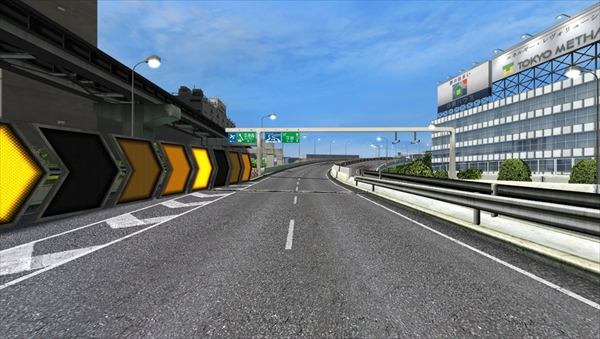
1.Heiwajima
High speed corner leading to a long straight line.
It is easy, but you must not get careless and make a mistake, or you may waste a lot of time.
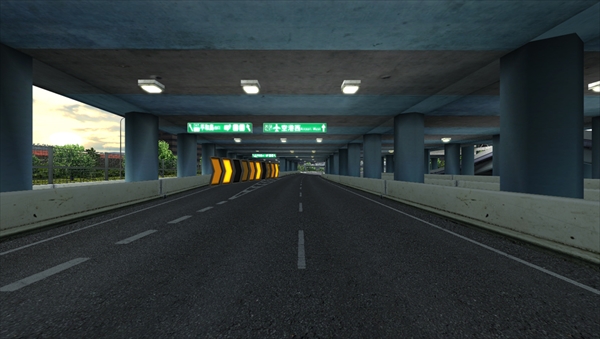
2.Exit of Haneda Tunnel
It's easy to slip up on the steep slope, but you will be OK if you make sure to get into the inner lane and turn the corner.
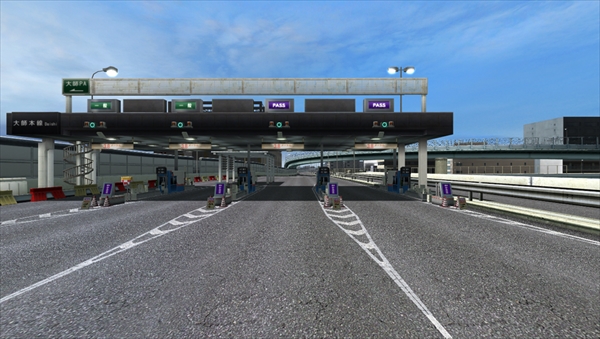
3.Daishi Tollgate
This tollgate is very narrow.
Be careful not to crash.
4.Hamakawasaki
Just like the Yokohane upbound line in the opposite lane, Feel-good area where you can drift!
Yaesu Area
Yaesu Line Inward
Total Length:17.3km
Characteristics
Downbound line from Tokyo to Kanagawa. Just like Wangan Line upbound, this course has artificial structures like a giant bridge and a big tunnel.
Course layout
Just like the upbound course, this course has a long straight line with three large lanes.
When you're running out of time, or fighting a close battle, your skill at taking corners, even easy ones, will put you ahead of your rivals. It is essential to have good technique that lets you keep up your speed.
Course Guide
1.West Ginza Toll Booth
At the West Ginza JCT, when heading toward Yaesu, there is a toll booth right after a fork in the road! Watch out for collisions!
2.Kandabashi JCT Merge Area
The rising corner that joins C1 has a jump spot in the latter half and is very difficult.
3.Kyobashi JCT Merge Area
Right before the merge, there is a jumping spot. And the road is very narrow, so be careful of the walls !
4.Kyobashi Toll Booth
Immediately after the toll booth, a right corner appears in this difficult spot! You will have to concentrate to avoid crashing here.
5.Yurakucho Area
This is the most colorful place in the heart of the city! The neon sparkles brilliantly.
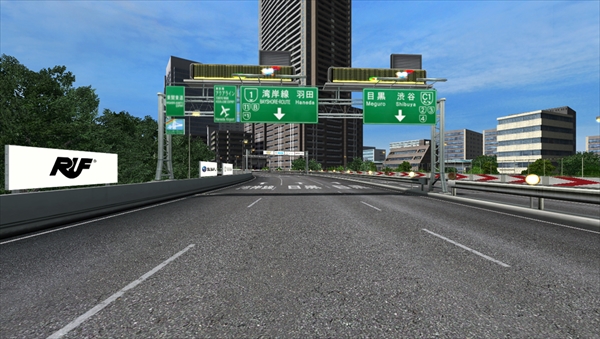
6.Dobashi Entrance Area
There are some difficult right-angle corners. You will enter at high speed, so braking is key !
Yaesu Line Outward
Total Length:15.3km
Characteristics
Just like the Yaesu Line Inward direction it goes through buildings and tunnels.
In lively places like the shopping district, the night lights are a must-see.
Course layout
Just like the inward direction, it is a layout that requires a fair amount of skill, but with corner approaches from the opposite direction, it necessitates a different strategy.
Course Guide
1-1.Kyobashi JCT Area
Going up a steep slope, you merge with the Yaesu lineLine, but right after the climb is a 90-degree corner, so be prepared!
1-2.Kyobashi JCT Area
2-1.Yaesu Tunnel Exit Area
Right after a fast S-curve there is a toll booth, so don't run into it.
2-2.Yaesu Tunnel Exit Area
3.Ginza-Shinbashi Area
This area runs alongside the bullet train. The road is particularly narrow here!
4-1.Shiodome Toll Booth
If you get through the gate without colliding, you'll find C1's familiar Shiodome S-curve. The entrance to the S-curve is different, so you'll have to work out a different line.
4-2.Shiodome Toll Booth
5.Kandabashi JCT Area
A corner going into the Yaesu Tunnel. Visibility is poor, and there is a jump at the entrance, so it is difficult to see the best path.
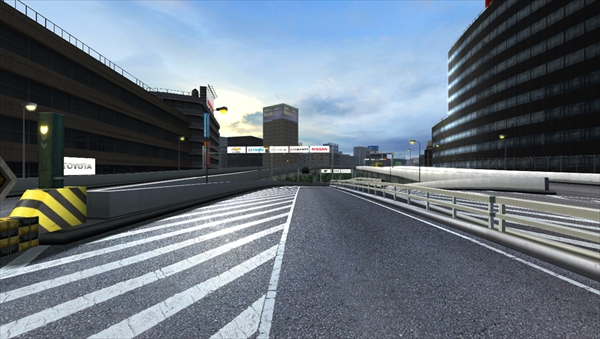
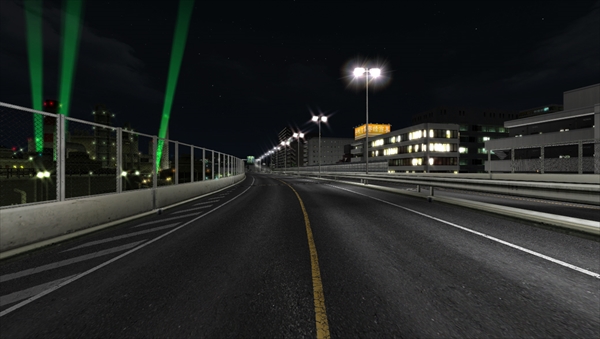
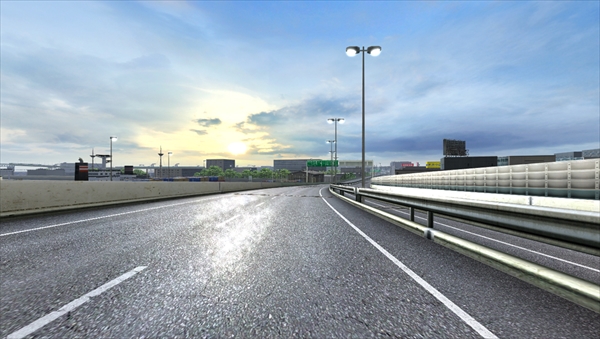
Yokohama Area
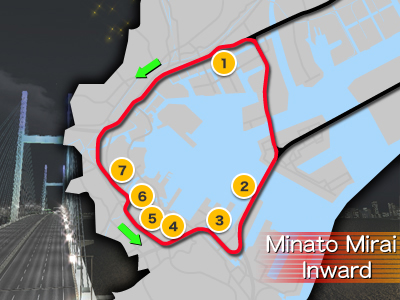
Minato Mirai Inward
Total Length:15.2km
Characteristics
This course runs through the Yokohama City Wangan Area.
The scenery changes rapidly, featuring the famous Bay Bridge and Marine Tower, as well as underground tunnel areas and more.
Course layout
The gentle and speedy area comes together at several characteristic corners, and even with more powerful settings keeping your speed while exiting the corners is the most fundamental strategy.
Course Guide
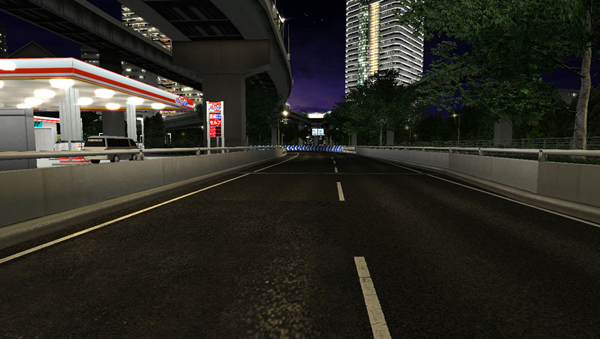
1.Namamugi Exit Area
When lit up, the structures in this uniquely-shaped industrial area look magical, especially at night.
2.Bay Bridge
The biggest highlight of the Minato Mirai area! Rely on speed to fly through the long straightaway piercing through the huge bridge supports in one burst.
3.Shin-Yamashita
Right in the middle of the Port of Yokohama. With the large commercial vessels parked there, it really gives off the feeling of a port town.
4-1.Ishikawacho JCT/Toward Shin-Yamashita
A right-angle corner appears as soon as you leave the tunnel. It's hard to read the line, but that line is affected by your speed when exiting.
4-2.Ishikawacho JCT/Toward Shin-Yamashita
Once the tunnel exit comes into view, you're almost there!
5.Tunnel Area
Although it is an underground area, flashes of the sky and buildings through the gaps in the ceiling and the view of the opposing lanes through the pillars give this a surprisingly open feel.
6.In-tunnel S-shaped Corners/Inner
Tough banks continue on both the left and right sides in this S-shaped area. The unevenness in the road after exiting the final left corner is pretty tricky, so be careful not to get blown into the outer wall.
7.Minato Mirai Area
A variety of buildings stand tall here, including the huge and intrepid Landmark Tower.
Minato Mirai Outward
Total Length:15.2km
Characteristics
As with the "Minato Mirai (Inner)", you can fly comfortably through the scenery of this port town at high speeds on this Yokohama Wangan area course.
Course layout
As with the Inner course, the layout consists of each corner connected by high speed areas, but the difference in elevation is the opposite of the Inner course, so you must be careful in areas where grip becomes unstable.
Course Guide
1.Koyasu Area
This is a sudden drop spot with sudden drops going straight down at approximately 300km/h. Grip becomes totally unusable, so be extra careful while proceeding!
2.Shin-Yamashita Area
This lower loop area appears after passing through Bay Bridge.
3.Marine Tower
Marine Tower, the famous Yokohama port town landmark. The Minato Mirai area ferris wheel is visible in the distance.
4.Ishikawacho JCT/Toward Yokohama Park
Enter the by-pass for a sudden right-angled turn! On top of being really steep, this challenging area requires fast, rhythmic steering.
5.In-tunnel S-shaped Corners/Outer
This opposite version of the "Inner" area goes in the other direction and looks similar, but it is somewhat easier to clear than the Inner area.
6.Yokohama Station East Gate Area
The center of Yokohama City. This area is lively with station buildings and commercial facilities.
Nagoya Area
Nagoya Speed Ring
Total Length:14.9km
Characteristics
This course, circling clockwise around the government buildings and skyscrapers in the center of Nagoya City, takes you on an up-and-down roller coaster ride.
With long straights and high visibility, you can be sure it's a high-speed area.
Course layout
Although the course diagram make it look like a long simple oval, the course is actually a high-speed area packed with corners, undulating roads, banks and altitude changes that mean you'll need superb machine control.
You may be tempted to up the power settings for the long straights, but your speed out of corners will affect your overall time. You'll need to get a good handling balance to master this course.
Course Guide
1.Meidocho Junction
The sharpest corner in the course.
The corner is sharp, but the exit is wide. Use this feature skilfully, exit at top speed and master this section!
2.Shinsuzaki Junction Area
The crank shaped corners that appear midway through the long straights can be cleared at full throttle if you nail the best line.
The roads get narrower here, maybe making it a decisive point in battles.
3-1.Sannobashi Area
Three-lane high speed corners.
The dips in the road as you move into the corners might throw you off a bit, but make sure to keep your nerve.
3-2.Sannobashi Area
Don't forget that there are jump spots at the corner exits too!
4.Higashibetsuin Exit Area
An area with two successive sharp corners.
The line that links the two corners is what you're after.
5.Tsurumai South Junction
The corners look harsh, but you can take them at close to full throttle thanks to the high banks.
But watch out. The road is tighter than in the high-speed areas.
6.Long Southbound Straight
A long wide straight with 3 or 4 lanes. Piling on the speed down the long straights is the key to improving your time!
7-1.Higashikataha Junction
Deep turns around drift corners await you here. The condition of the road at the entry to the corners is poor - make sure you don't slide out!
7-2.Higashikataha JunctionT
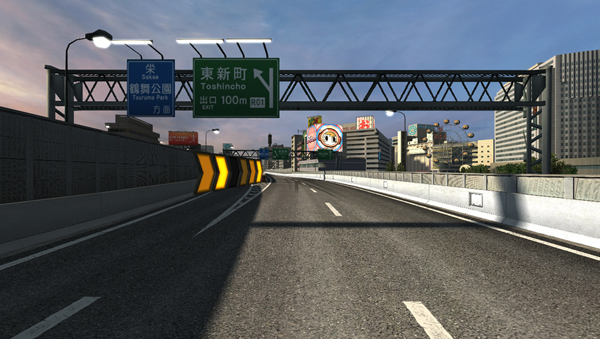
If you go just over the edge coming out the corner at the Toshincho exit you can seize the shortest line!
8.Marunouchi Area
Straight-line areas let you take in the government areas, towers and other characteristic Nagoya buildings as you run through the course.
When night falls, orange illuminations light the course.
Osaka Area
Hanshin Expressway loop Line
Total Length:18.7km
Characteristics
This line runs through the very center of downtown Osaka.
There is a huge amount of variety in this course, with oddly-shaped impressive buildings, and many changes in the width of the road.
Course layout
Each corner has its own characteristics that require specialized techniques.
The corners are connected by long straight lines, so there is a huge speed range in this course. Because the width and slope of the roads are always different, You need all-round skills to win in this course.
Course Guide
1.Nakanoshima S-shaped area
A technical right-left-right S-shaped corner appears here.
Focus on the hardest corner, the last one, and decide on what lane and in what rhythm you will race through the first and second corners.
2-1.Honmachi
The tightest corner in Hanshin Expressway loop Line!
Start braking just after landing at the jump spot at the corner entrance!
2-2.Honmachi
You jump then you will find a tight corner immediately.
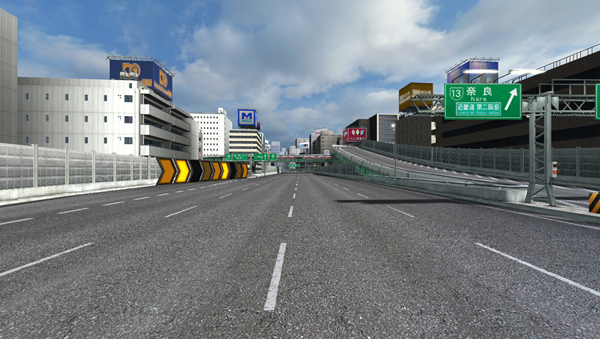
3-1.Route 13, to Higashi Osaka Line
It is a tight twisting corner, but not as difficult as it looks because it is a rising road.
However, you cannot be careless at the exit. It is a jump spot!
3-2.Route 13, to Higashi Osaka Line
There is a jump spot just after you pass through the corner.
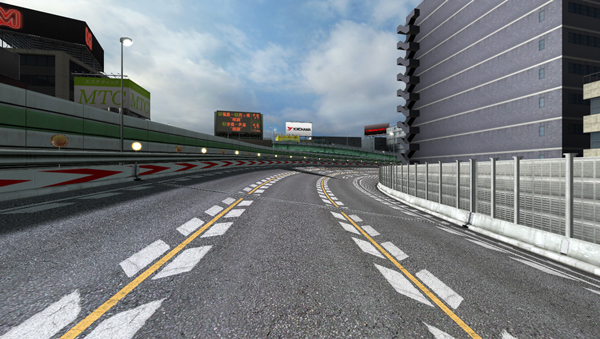
4.Higashi-Senba JCT 3-lane S-curve
The road is wide and looks simple at first glance, but it’s a difficult area in which you can lose lots of speed in you don’t get in line properly! Be sure to take advantage of the wide road and take a wide line to avoid losing speed!
5.Wide straight line
Wide straight line with four lanes. Deal skillfully with the many official cars in the road.
6.Near Minatomachi
Very sharp and narrow corner. The looming walls make it difficult for you to read the lines.
If you can exit this corner at high velocity, it will lead to better times along the next long straight.
7.Route 15, to Sakai Line
Banked corner with wide lanes.
Pick up speed at the exit making use of the gradient of the road!
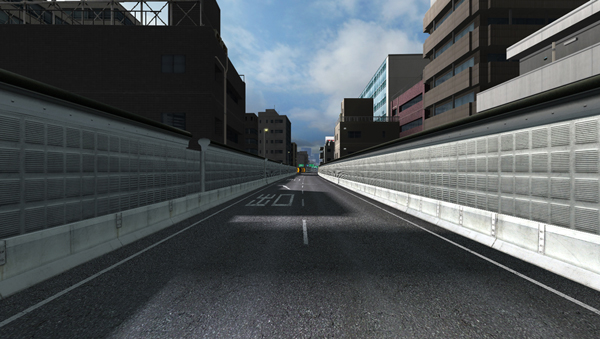
8.Near Yuhigaoka
This area has the narrowest lane of all areas in Wangan Maxi 3!
Be careful about the walls looming in on the right and left.
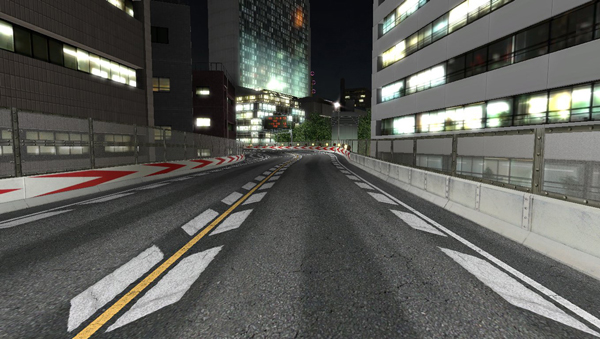
9.Nanba S-shaped area
There are consecutive corners, but once you decide on your line, you can race through at nearly full speed!
10.Near Ebisu-cho
Right-angled corner which slows your speed down.
Early braking and "Slow in and Fast out" is necessary for getting better times.
Kobe Area
NEW
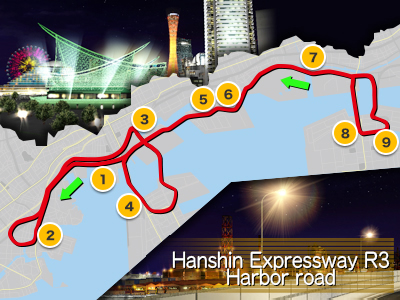
Hanshin Expressway R3/Harbor road
Total Length:19.1km
Characteristics
A challenging route, this course weaves a tricky trail of high-speed zones through the famous scenery of the port city Kobe, enveloped by mountains and ocean waters. The entire scope of your driving skills will be put to the test by a wide range of challenging points, including elevation differences, multiple corners, toll gates, chicanes, and more. Race past sundown to get your fill of Kobe’s ten million-dollar nightscape! Enjoy the feeling of racing through the diamond glitter of the city at night.
Course layout
There’s a lot of variety in the types of corners in this course. The racing line is punishing and the tough points come at you one after another, making this the place to really lay out a strategy. For your settings, it’s probably safest to err toward handling for better maneuvering at the corners. Start by getting a grip on the key points of the course, then gradually increase your overall speed while building up your racing line.
Course Guide
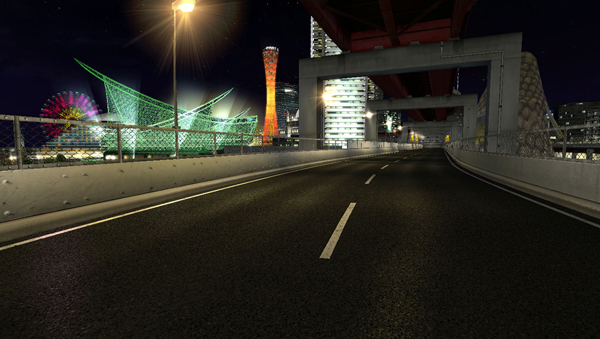
1.Near Shinkocho
This is the heart of the city, and everything hear screams “Kobe!”, from the tower and the sculptures to the Ferris wheel.
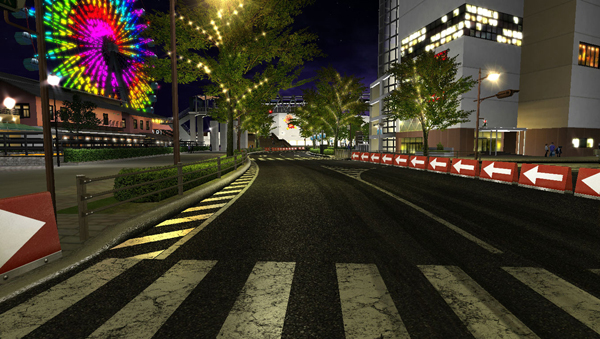
2.Next to the Shopping Facilities
Just after the left turn is a massive right return loop. Being nimble with the timing on your steering here is key!
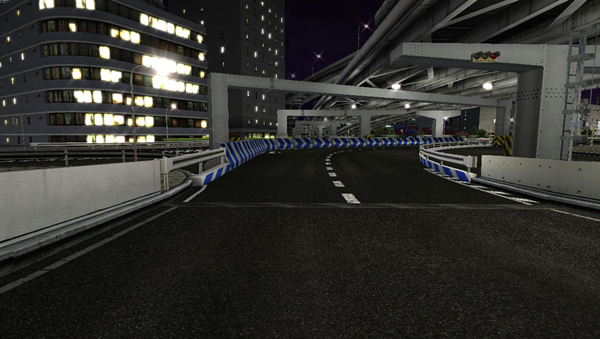
3-1.Ikutagawa Ramp to the Minatojima Tunnel
Just after making it through the right-angle corner immediately after the Maya Exit, you’ll be confronted with the high-speed chicane at the tunnel entrance! The wall penalty is quite steep if you make a mistake, so make sure to keep to the racing line.
3-2.Ikutagawa Ramp to the Minatojima Tunnel
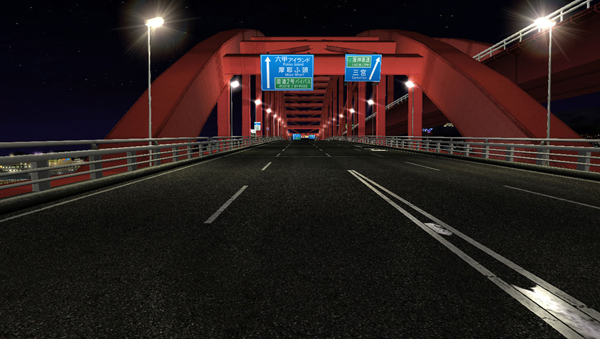
4.Kobe Ohashi Bridge
From Port Island, you’ll make your way back to the mainland looking out on the night scenery. The road widens out, so this is your chance to overtake!
5-1.Maya Wharf
Not only is the entrance to the elevated road narrow, as soon as you squeeze through the upper left turn you’ll be facing the tollgate! It’s a real nasty patch. Your racing line and your rhythm make or break this section. Don’t slip a bit while you make your way through this gauntlet!
5-2.Maya Wharf
6.Higashinada Ward
Turn your view downwards and you’ll see the light of the residential areas clustered along the mountainside. The “million dollar night view” name isn’t just for show.
7.Takaha Ohashi Bridge
This bridge runs high up over the seawater in the harbor district. In the Kobe area, there are many bridges that span the sea.
8-1.Right-angle Corner
As soon as you’re over Rokko Ohashi Bridge, the road narrows and you enter the area’s largest deceleration section. Come in too fast and you’ll actually end up worse for it. Once the gas station on the left comes into view, get ready to break!
8-2.Right-angle Corner
9-1.Hanshin Expressway Entrance
Right after you get through the tollgate, you’ll have a multiple low-speed corner section going left, then right, then left. Judge the best and worst of each corner and get through with pinpoint steering.
9-2.Hanshin Expressway Entrance
10.Maya Toll Gate
Halfway through the left turn and a tollgate shows up! When you include the right turn immediately afterwards, this is a seriously tricky section for keeping to your racing line. At the turn before the tollgate, don’t come in on the inside: you’ll need to nudge your racing line somewhat toward the outside. An exclamation mark will appear as a warning beforehand, so make sure you’re prepared to make it in!
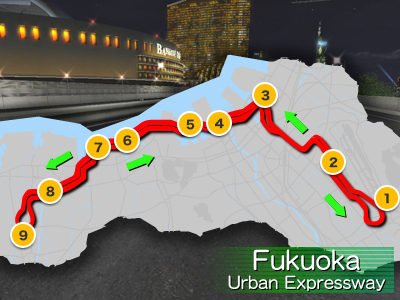
Fukuoka Area
Fukuoka Urban Expressway
Total Length:16.8km
Characteristics
In this course, you drive from east to west in Fukuoka city center through various landscapes such as an urban area, the airport, the ocean front and many more.
Continuous high-speed undulating corners going up and down are provided in combination with longer straight zones.
Course layout
Although there are many two-lane road sections, the road width in this course is wider than the other urban courses. Therefore, you feel like you have a relatively wide space while driving.
The critical point for conquering this course is whether you can drive with a rhythm, finding out where the line of the high-speed continuous corners is.
Depending on the settings, the course requires a handling technique to be able to hold on without losing any time in the high-speed corners.
Course Guide
1-1.Tsukiguma Exit
Two continuous jumps right after getting into the frontage road.
1-2.Tsukiguma Exit
Be on guard at the loop corner right after those jumps.
2.Airport Area
The zone to run through while glancing sideways at the airport facilities or airplanes. The easy corner and long straight line in this area make you really speed up.
3.Chidoribashi Junction
The characteristic sharp corner where opposite lanes curve while crossing above and below! To turn through this corner, place your machine to the side while reducing speed before the corner and keep the drift.
4.Tenjinkita Ent/Exit Area
Continuous high-speed corners with heavy ups and downs undulating left and right. Characteristic zone which represents Fukuoka Urban Expressway!
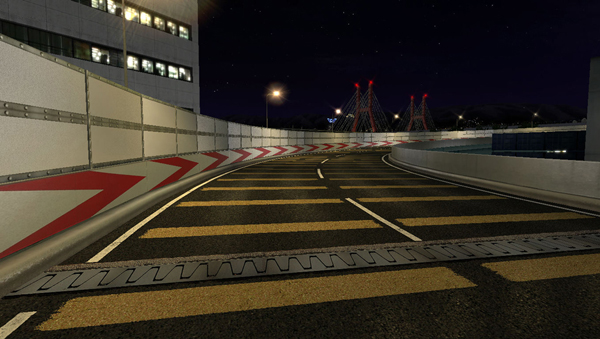
5.Aratsu Bridge
Aratsu Bridge crossing over Hakata Port. Not only is this bridge stylish; but also its surrounding view from a high altitude is quite exquisite.
6.Ocean Front Area
Ballpark and first-class hotels on your right. Excellent ocean view on your left. Scenic beauty spot.
7.Momochi Area
A sharp square corner appears. Use the "Slow-in and Fast-out" method to steadily turn through this corner.
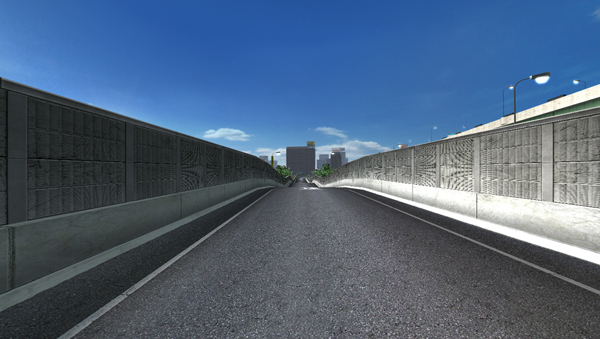
8.Meinohama to Atago zone
The 1-km long straight line. The key to running fast through this zone is to develop your escape speed at the corner before moving into the straight line.
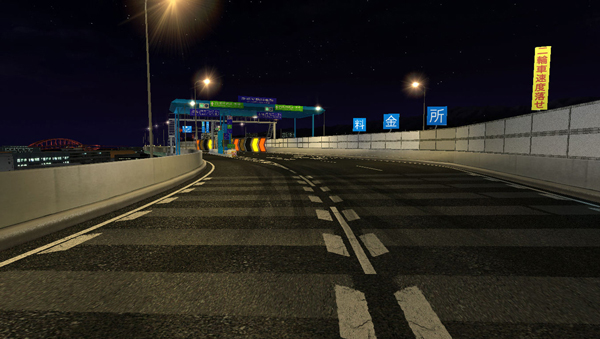
9.Fukushige Ent/Exit
The loop corner which merges into the entrance again once you are out from the Fukushige Exit. Maintain the long-distant drift and keep the speed.
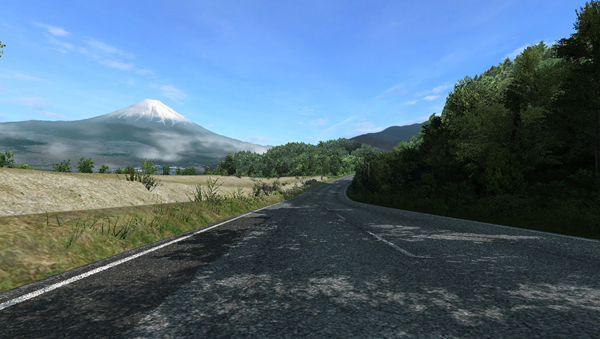
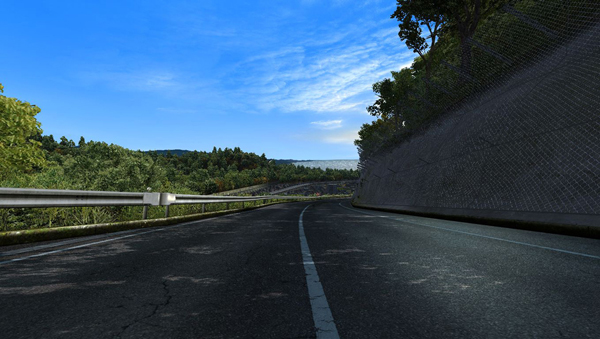
Hakone Area
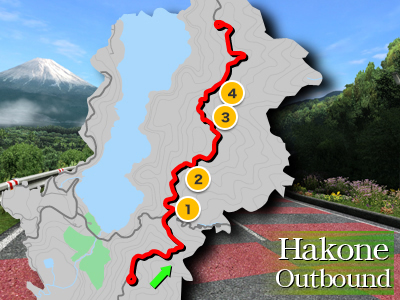
Hakone Outbound
Total Length:8.4km
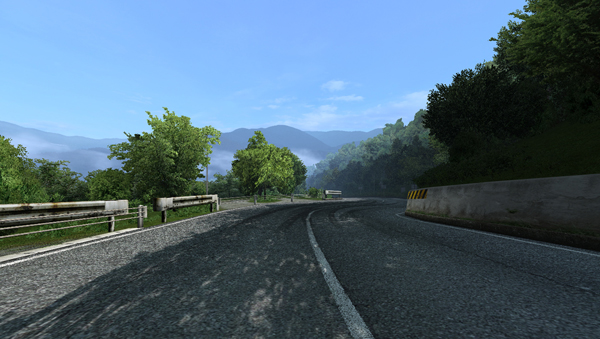
Characteristics
It is totally different from the bustling city area; you can race in the midst of nature in the early summer.
It's amazing to see Mt. Fuji through the gaps in the bright green woods! At night, you can enjoy the night views of the foot of the mountain.
Course layout
You need good technique for this roller coaster-like course, with its intermittent low speed curves and steep ups and downs.
As your tuning improves, you will need to improve your car control to keep up.
It's normal to focus on handling tuning, but it's really satisfying to all out for power-focused tuning!
Course Guide
1.Shoulder
You can race on the road shoulder at some part of this course!
Maybe you can shorten your time?
2.Chicane
Awkward-shaped corner, but you can pass through at high velocity if you keep a straight line.
3.Consecutive Tight Corners
Just after passing through the high speed area, There is an area with consecutive technical narrow corners.
As there are many double corners, positioning is very important!
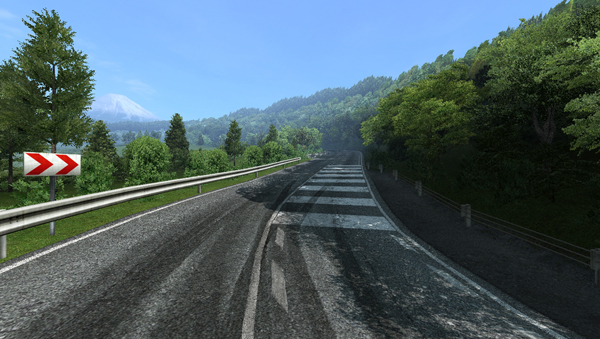
4.High Speed Area
This is where you can accelerate most!
Steeps ups and downs, and release from gravity at the top of the slope. You have to control your car well here.
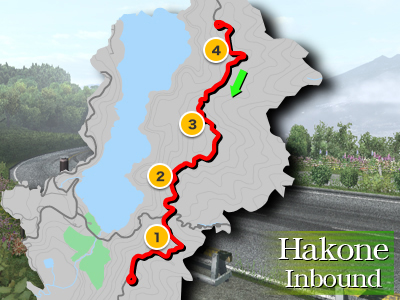
Hakone Inbound
Total Length:8.3km
Characteristics
In this "Backward" course you start from the endpoint and head to the start point of the "Outward" course.
However the views are completely different because you see them from the reverse direction.
Course layout
The characteristics of the course are very similar to the "Outward" course, But some corners look extremely different when you enter them from the other side (especially double corners!).
This means you will need another strategy to win in this course.
Course Guide
1.Ashinoko
Go down the slope and look over Ashinoko Lake.
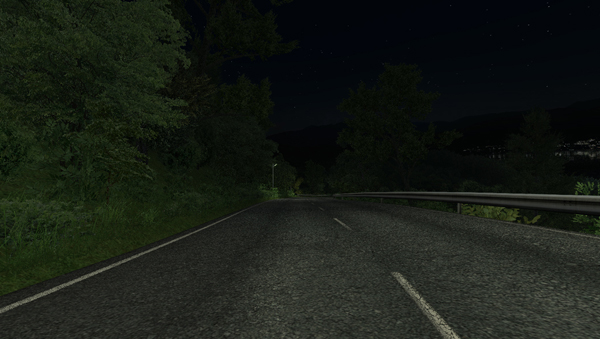
2.Full Moon
In this "Backward" course, you can enjoy looking at the moon at night.
It's a thrilling drive in the darkness led by the headlights.
3.Shrine
Oh, it's the "torii" gate of the shrine. Let's pray for safe driving!
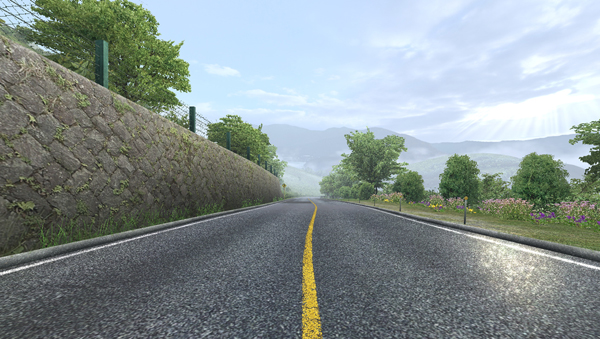
4.Flowerbed
In sharp contrast to the concrete jungle in Tokyo, You will feel comfort here, surrounded by flowers and green trees.
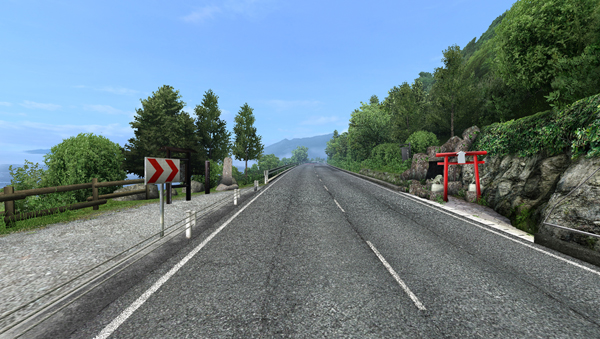
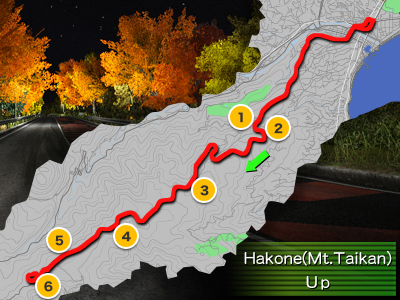
Hakone(Mt.Taikan) Area
Mt.Taikan Uphill
Total Length:12.1km
Characteristics
Mt.Taikan is an extremely steep hill climb. It's a technical mountain course with a vehicle speed range higher than the normal Hakone course. The foot of the mountain is also decorated with autumn leaves and Japanese silver grass.
Course layout
There are a variety of corners, each requiring their own strategy and kept challenging due to the high speed range. Judging the continuous back and forth turns will especially be a measure of player skill.
Course Guide
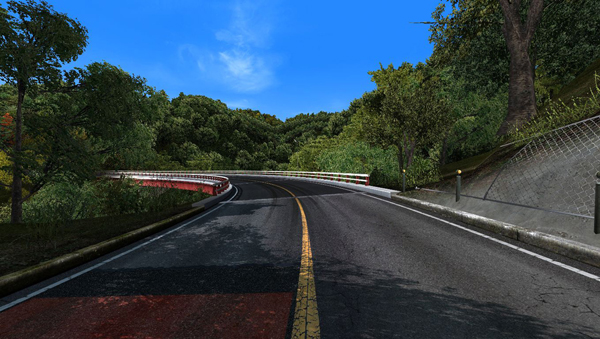
1.Loop Bridge
With its stunning red girders, this loop bridge makes for steep corners when coming off of the high speed section.
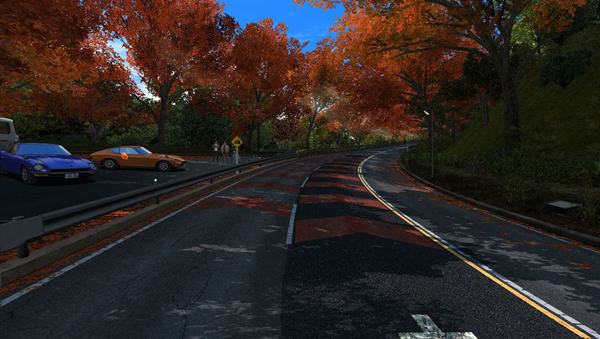
2.Parking Lot
Some sort of filming is going on in this parking lot under the falling autumn leaves.
3.Construction Section
The corner exit and outer side above the line make the Construction Section extremely narrow. Watch out for collisions.
4.Rest Stop Section
Once you see the rest stop surrounded by stones, the following area is a twisty section of corner after corner.
5.High-Speed Straight Road Section
This section gives the perfect opportunity to go full throttle for a long time.
6.Summit
An upwards climbing return point. Small corners appear one after another in this section. In particular, watch out for the difference in elevation after coming in from the high speed section!
Mt.Taikan Downhill
Total Length:12.8km
Characteristics
This is a reverse of the climbing route. This downhill course offers occasional glimpses of the ocean and the cityscape along with a beautiful night view.
Course layout
In addition to the original technical layout, descending increases the driving speed and ups the required amount of skill. Also, in addition to the twisty folded loop at the foot of the mountain, there is a toll gate which can become the deciding point of the race.
Course Guide
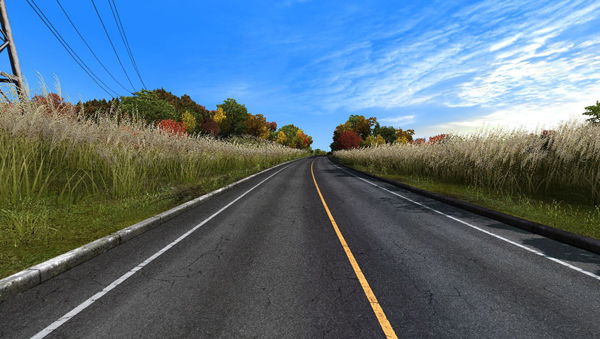
1.Silver Grass Field
The wide field of Japanese silver grass gives this section a spectacular autumn sensation.
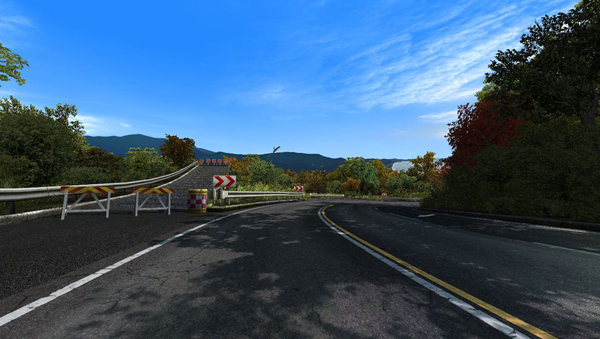
2.Evacuation Zone
The downward corners of the evacuation zone are particularly difficult. Go down the path utilizing the road width.
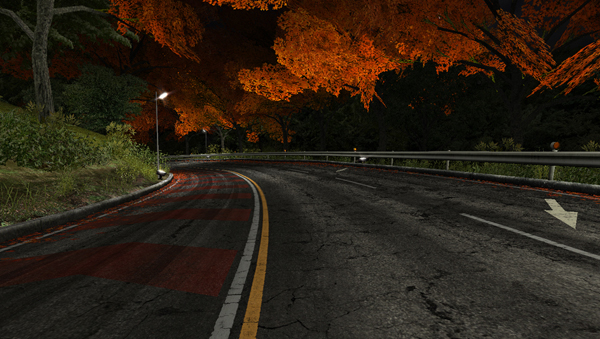
3.Autumnal Leaves Area
The three lane wide corners are basked in light. Watch out for poor road conditions.
4.High-Speed Base Section
A high-speed corner section appears as you near the foot of the mountain when heading down. The increased speed from descending makes it quite difficult!
5.Tollgate
A tollgate at the foothills. Make sure not to collide with it!
6.Downwards Return Loop
Once you return to the city district, it loops back. The extremely twisty nature here requires quick reflexes for steering.
Metro Hwy (Tokyo)
Tokyo Area
Total Length:59.8km
Characteristics
An extremely long course that goes through all the metropolitan Expressway areas. It takes a long time to complete, so it is important to maintain your concentration until you finish the race.
Course layout
At the Edobashi bridge and Hamazaki branching points, the branching direction is different from other lines. The corners at the branching points are difficult sudden corners that provide the key to winning the race.
Course Guide
1.Edobashi branching, straight line to the west
The corner which usually turns to left branches in a straight direction.
The corner appearing just after the branching point is an intricately-shaped double corner. Choosing the best line is the best strategy.
2.Hamazakibashi branching, left corner to the west
The corner which usually goes straight branches to the left.
Excessive speed results in time-wasting! Appropriate speed reduction is a key to winning at this corner.
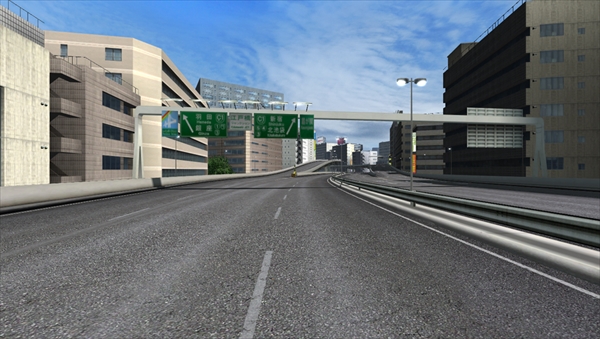
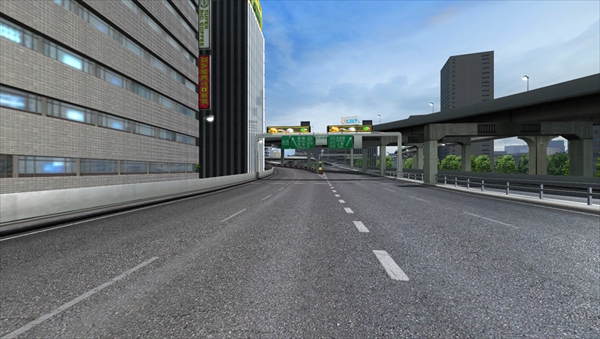
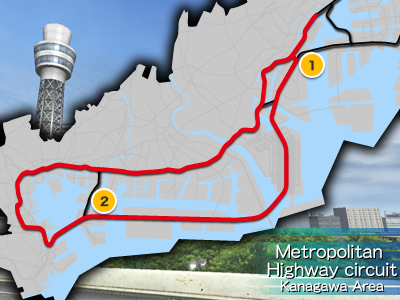
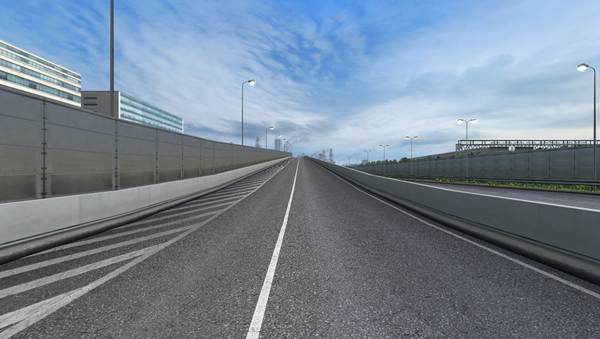
Metro Hwy (Kanagawa)
Kanagawa Area
Total Length:48.7km
Characteristics
This long course cuts vertically through the highest speed area in Kanagawa Prefecture, from the bottom of the Yokohane line up through the Minato Mirai area to the eastbound Wangan Line.
Course layout
The high-speed area comes together at several characteristic corners, and even with more powerful settings keeping your speed while exiting the corners is the most fundamental strategy.
Course Guide
1.Oi JCT
A sudden right-angled corner appears in an instant just after passing through the Oi tollgate, heading straight for the sky!
Approaching it with your load about to fly off requires real technique.
2.Daikoku JCT
Fly all the way through this gradual, super high-speed 3-lane area crossing from Rainbow Bridge to Tsurumi Tsubasa Bridge!
The Loop Line heading in all directions provides for unique scenery.